Surprise! After 2 years I finally have another update on how the boat is
progressing!
Since my last post I have got married and suddenly the amount of free time I have to build the boat has dramatically decreased. Boat building is a spectacularly fun hobby however there are lots of things in life which much more important than boatbuilding and fortunately they are usually equally or even more enjoyable.
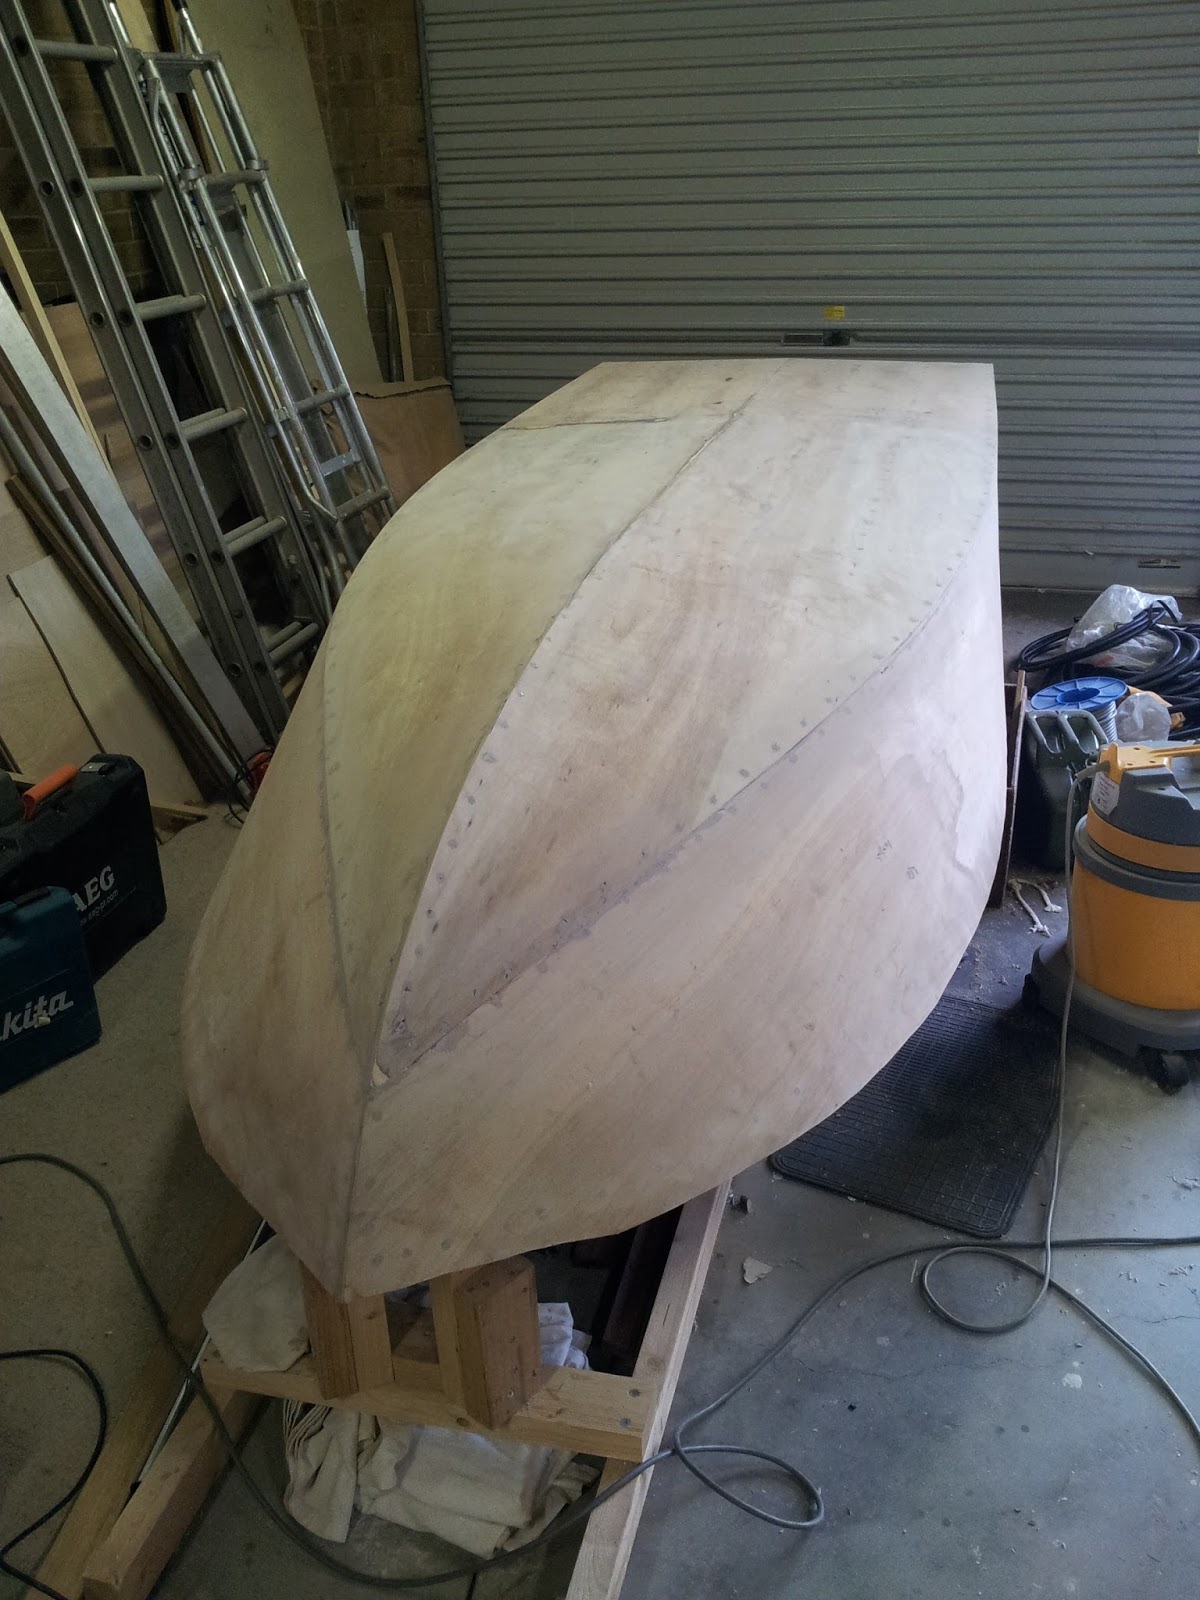
Since by last post, I have finished installing the plywood on the
hull and have applied the fibreglass mat. The keel and keel strip have also been installed.
The boat has been moved a few times and now resides in my own garage where no-one can express displeasure at its presence!
After all the plywood was installed, the next step was to fill up
all the holes made by the screws. I mixed up some thickened epoxy and filled
all the holes. It was actually quite a lengthy task. Once the epoxy was set it
was sanded down to get a perfectly flat hull.
 |
| Screw holes filled in |
I carefully sanded all the edges of the boat to get them smooth
and fair. The result was quite rewarding with a smooth wooden hull that any fool would know is a boat capable of floating!
 |
| Sanded Hull |
There was a bit of a low spot at one of the plywood scarf joints so I
spread out thickened epoxy to try and fill the void. I had limited success in
getting it perfectly flat but it is undoubtedly now flatter than it was. I also spent some time planing a flat spot along the centre line to facilitate the installation of the keel.
 |
| Epoxy on low spot |
The next step was to work out how to go about fiberglassing the
hull. This was a daunting but exciting step. I looked forward with great
anticipation to seeing the beautiful wood shining forth in radiant splendour
beneath a layer of glossy epoxy.
I got some advice from Duck Flat Wooden Boats on how to go about
fiberglassing and what cloth to use. The cloth selected for the bottom of the
boat was 450gsm double bias and the cloth selected for the sides was a significantly
smaller 6oz.
The 450gsm double bias cloth is quite thick and hefty and hence
will give good abrasion resistance for the bottom of the boat. The 6oz cloth is
quite light and while giving the sides some abrasion protection, it will be virtually transparent and hence will not impede
the view of the wood grain.
I was advised to get some System West epoxy for fiberglassing
as it is less viscous than the Boat Cote epoxy I was previously using. When I
began fiberglassing I was very pleased to have the West System epoxy as it
flowed perfectly into the weave of the cloth. I would highly recommend this product.
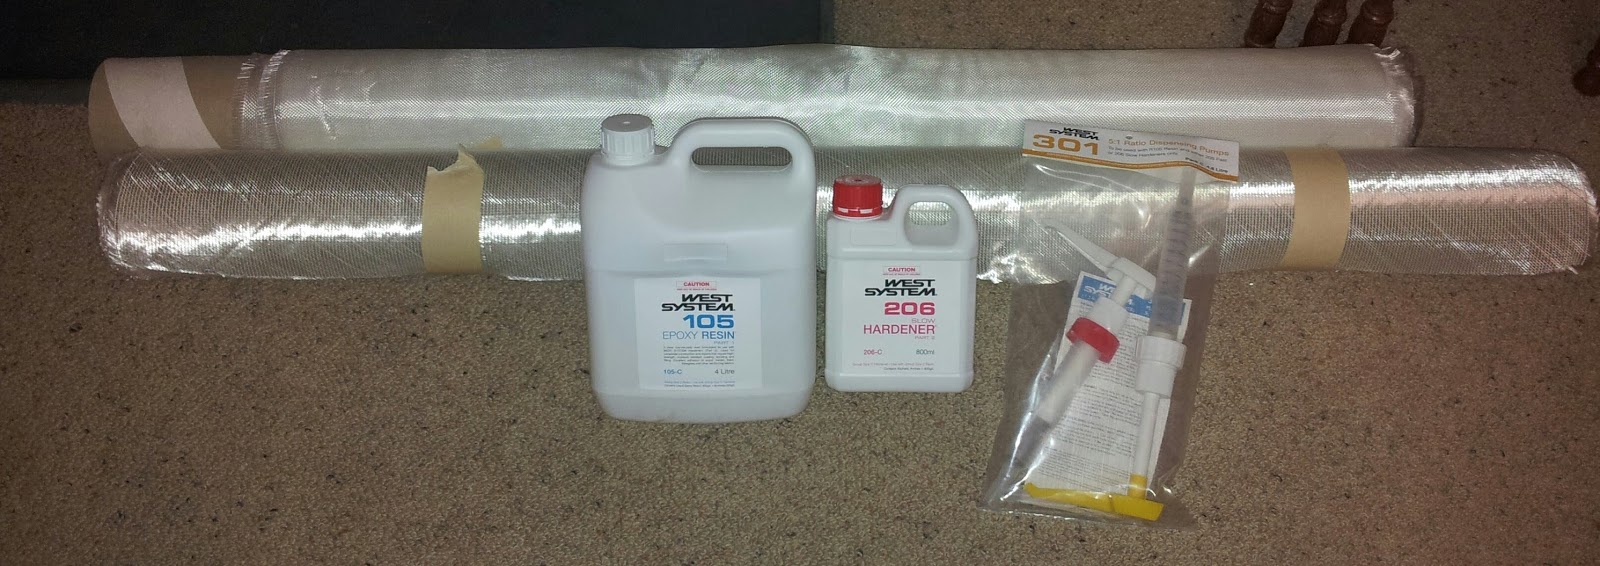 |
| Fiberglassing materials |
The first step was to sand the plywood to a nice smoothness with
120 grit sandpaper being careful not to touch the freshly sanded surface and contaminate it with oils from my skin. The surface of the plywood was then vacuumed to remove all dust.
The fibreglass was rolled out onto the hull and a good pair of
large scissors was used to cut the cloth.
 |
| Laying out the fibreglass |
I taped the cloth in place with
masking tape and wearing gloves spent about 10 minutes smoothing out the cloth.
The cloth was left overnight to settle into position.
 |
| Taped in place and ready to go! |
Next morning was the great event which could make or break the
hull of the boat.
My brother in law kindly helped me do the epoxying. I would recommend getting help with this until you get experienced at doing it. As soon as we started
mixing epoxy, pouring it on the cloth and working it into the weave with
plastic scrapers it became apparent that it was actually a very easy process! It
took about 1 hour to mix up all the required epoxy and work it into the weave.
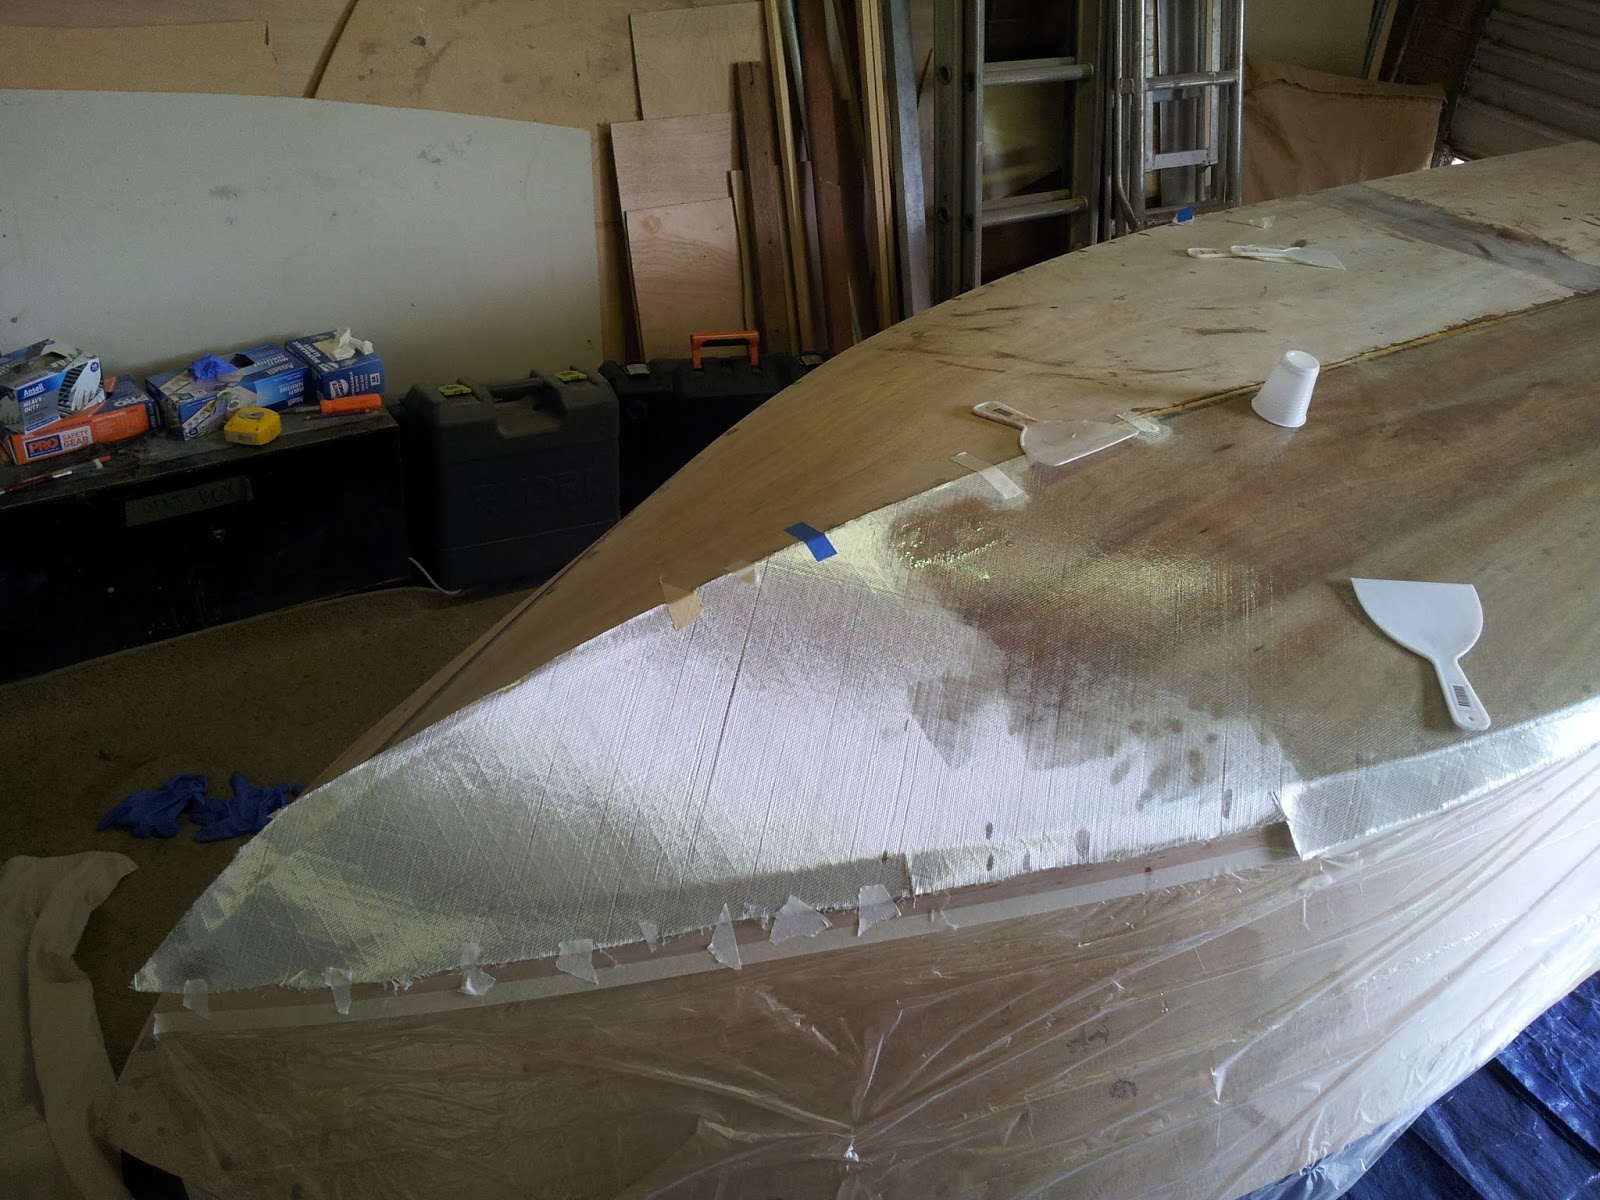 |
| Working the epoxy into the weave |
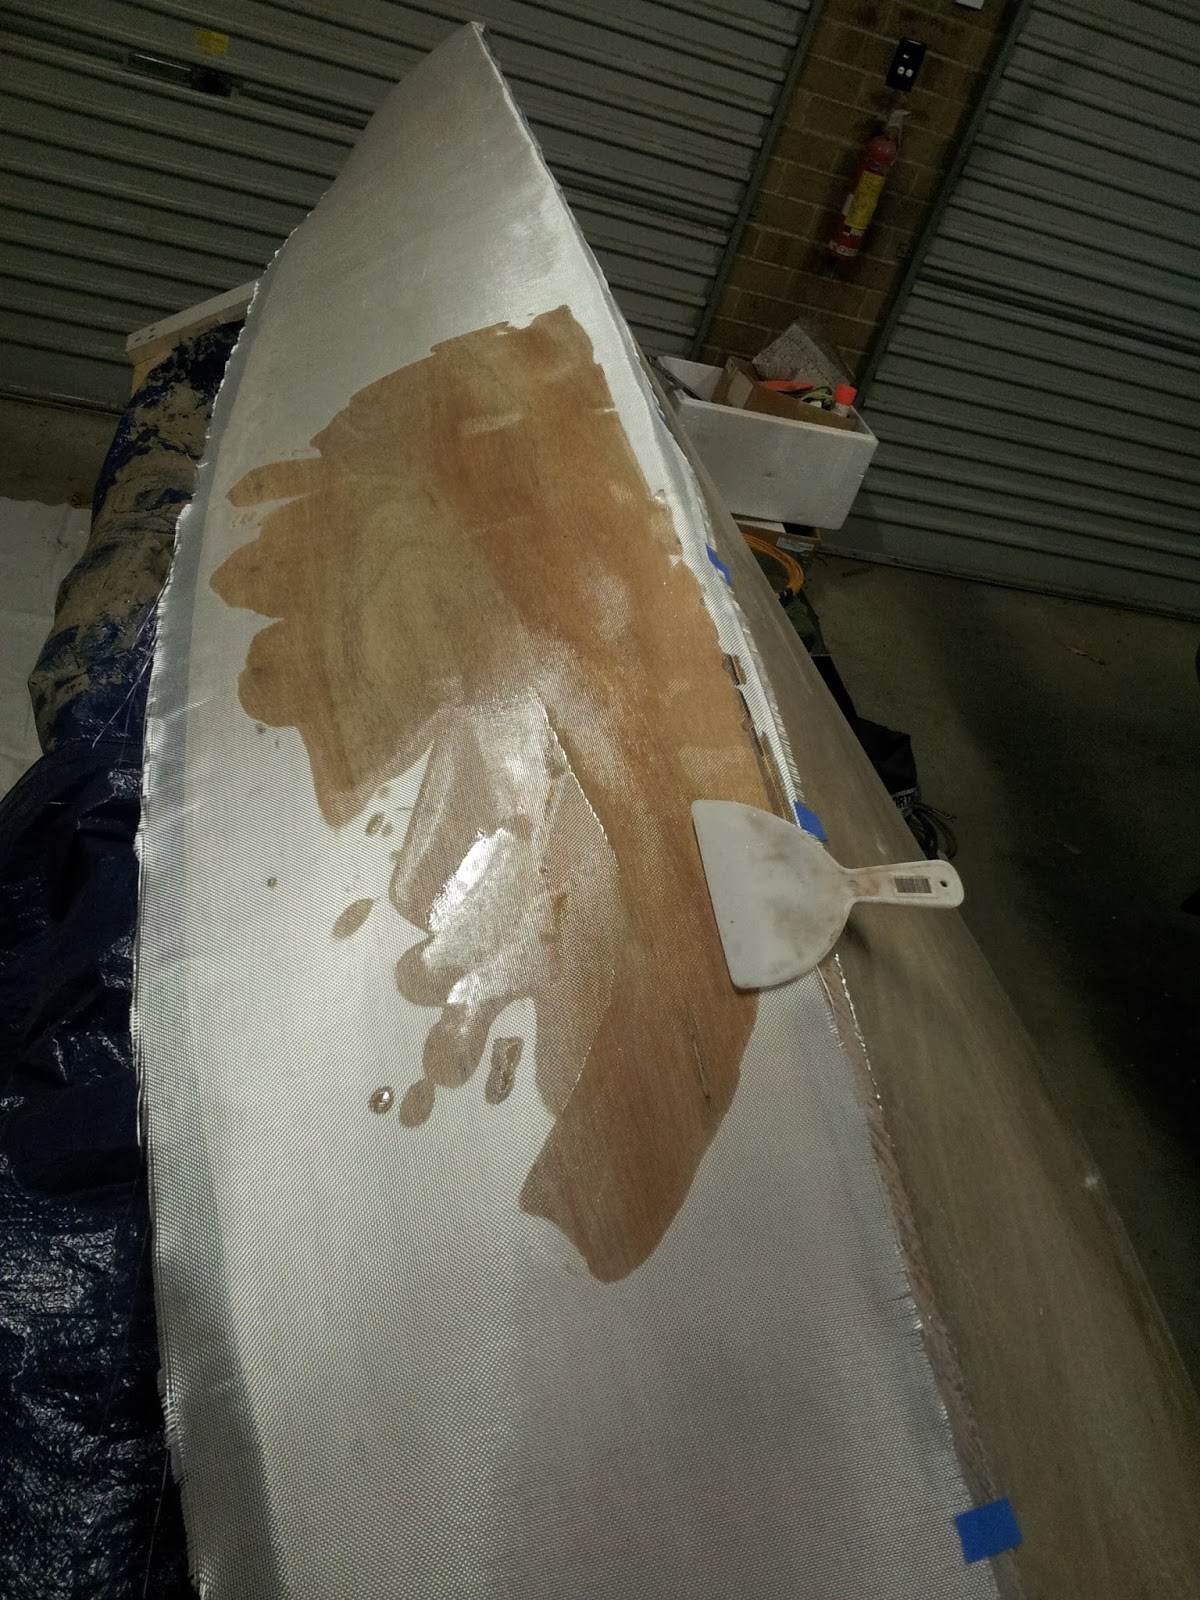
When the epoxy was tacky, using a foam roller I applied another
coat of epoxy to start building up a layer of epoxy above the cloth. I
repeated this again when the previous layer was tacky.
 |
| The other side |
To do the sides of the hull, the boat was tilted onto its side to try and avoid working against gravity as much as possible. I was worried about the amount of stress that the weight of the boat would put on the sheer but it proved to be well strong enough.
 |
| Tilted on the side |
 |
| Ready for epoxy |
The 6oz cloth used on the sides filled with epoxy more easily than the 450gsm double bias cloth and was a pleasure to work with. The cloth basically disappears once the weave is filled.
 |
| Filling the weave |
The completed hull did not disappoint and it was just as shiny as I had hoped for!
 |
| Fiberglassing completed! |
The boat's time in family garage came to an end and the it had to be moved into the other less glamorous shed. I attached some wheels to the building form and my brother in law helped me wheel it 20m up the footpath into the backyard.
 |
| I cant think why, but we got some interested looks from passing cars! |
The hardest part was the lift up the stairs! At a guess I expect the building form is at least 35% of the weight.
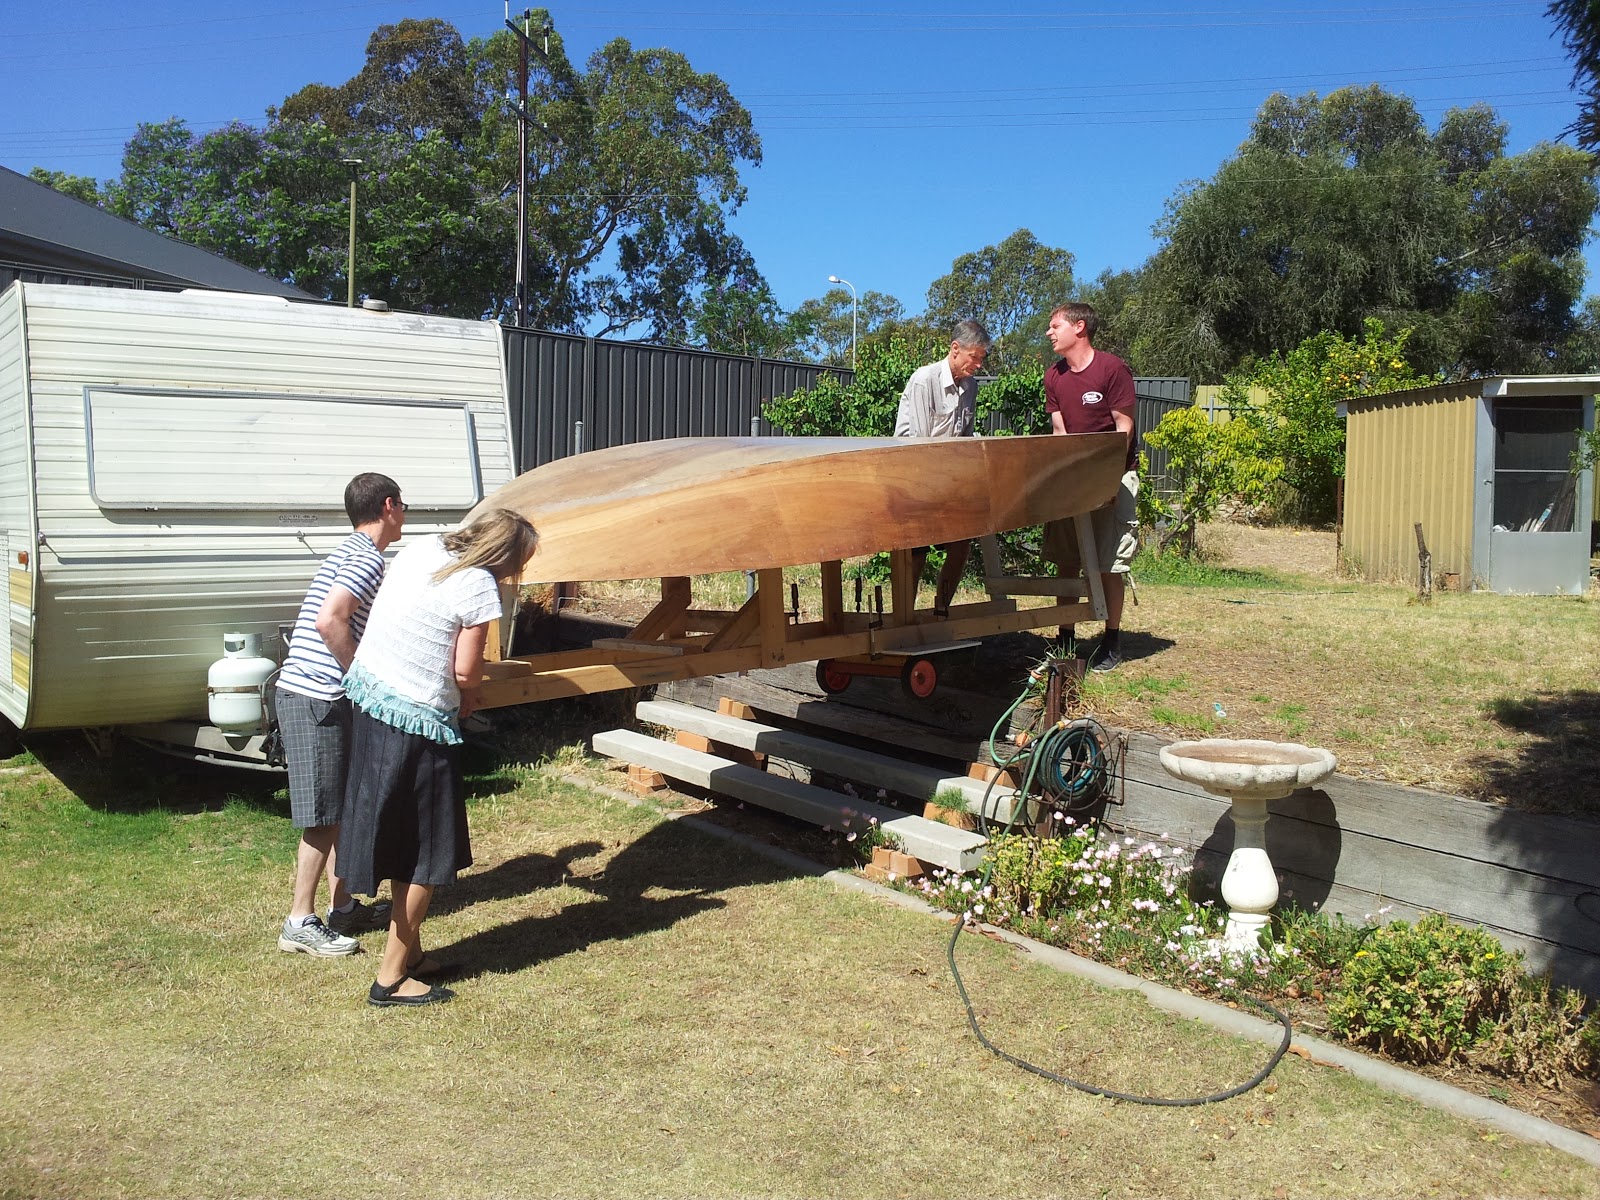 |
| My face says it all! Mate! It is heavy! |
Once we got the boat into its new shed a sense of accomplishment was felt by all!
I used some chipboard sheets to make a flat surface for the boat as I didn't want to put the building form directly on the irregular dirt surface.
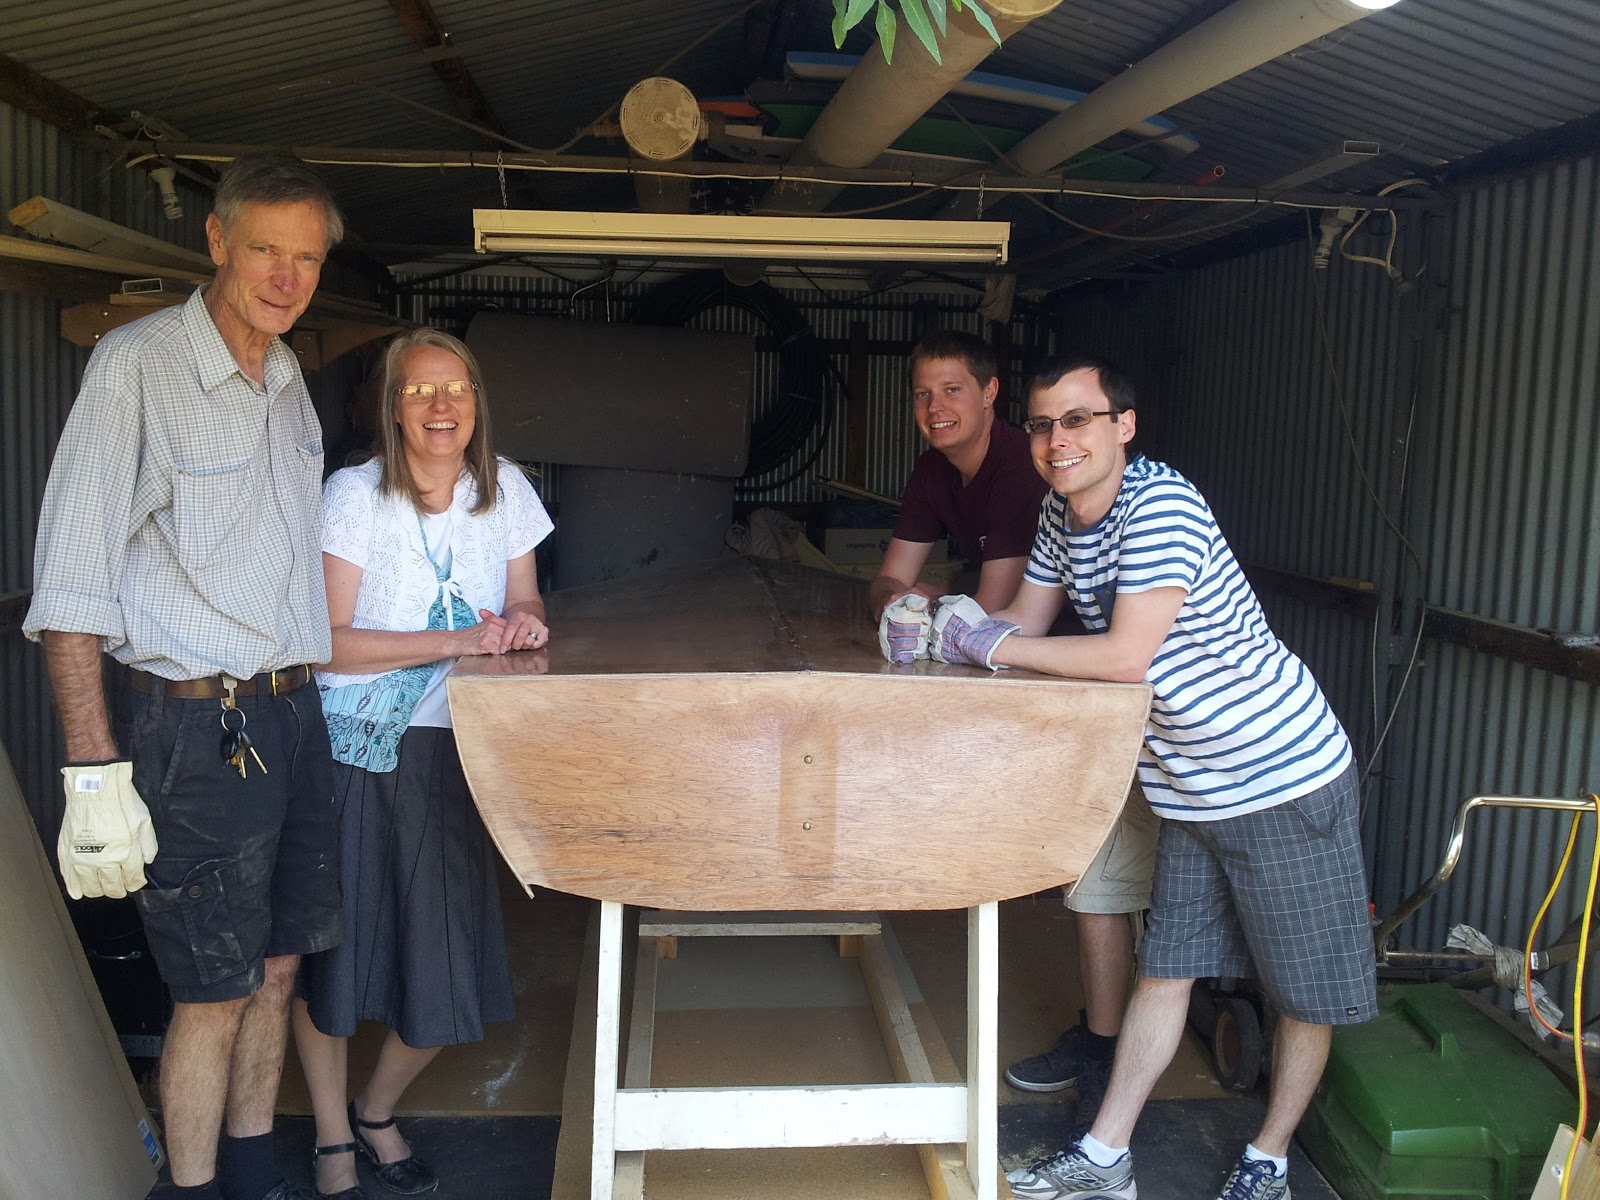 |
| Success! It's not every day you move a boat mid construction with your bare hands. |
The boat was left mostly untouched (except by spiders) while in the shed as I was busy with preparations for getting married.
I made a bed out of pallets during the time the boat was in this shed.
 |
| Figuring it out as I went |
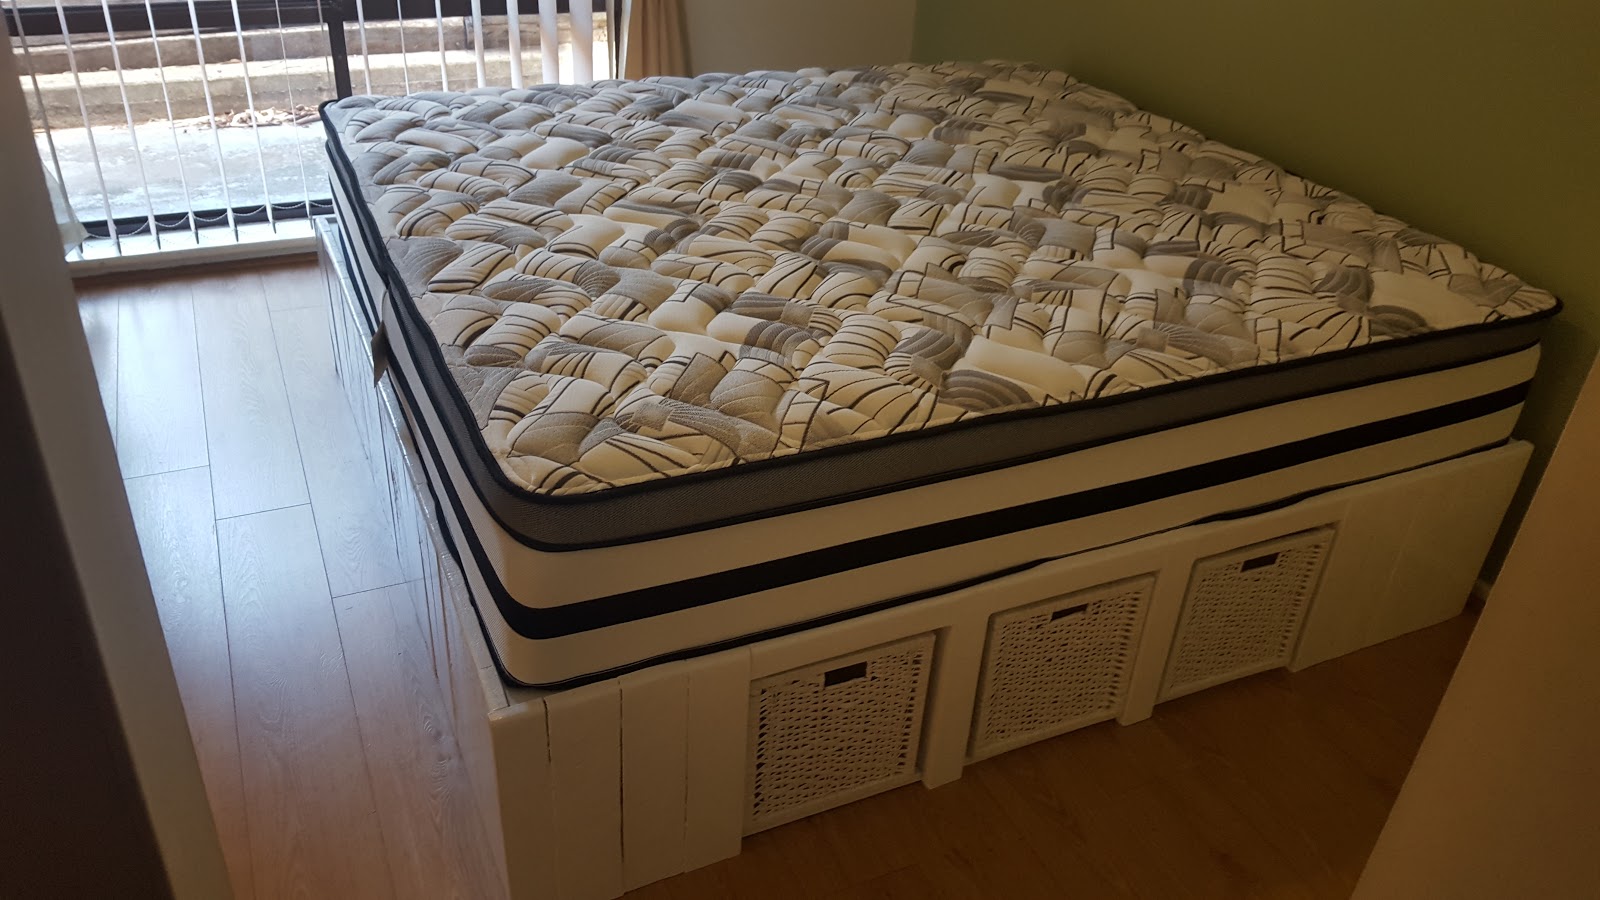 |
| The finished product. A matching headboard has since been built. |
After I got married, I had to move the boat to my house. Dad, Mum, Hannah, Shelly, and Joanna helped me get the boat into the trailer.
I fastidiously tied the boat into the trailer with many ropes and ratchet straps. The trailer was towed very carefully by myself using my Dad's V8 Toyota Land Cruiser!
 |
| Ready for the journey |
The boat sits comfortably in my garage while my Mazda 6 bears the brunt of whatever the weather throws at it!
 |
| New home |
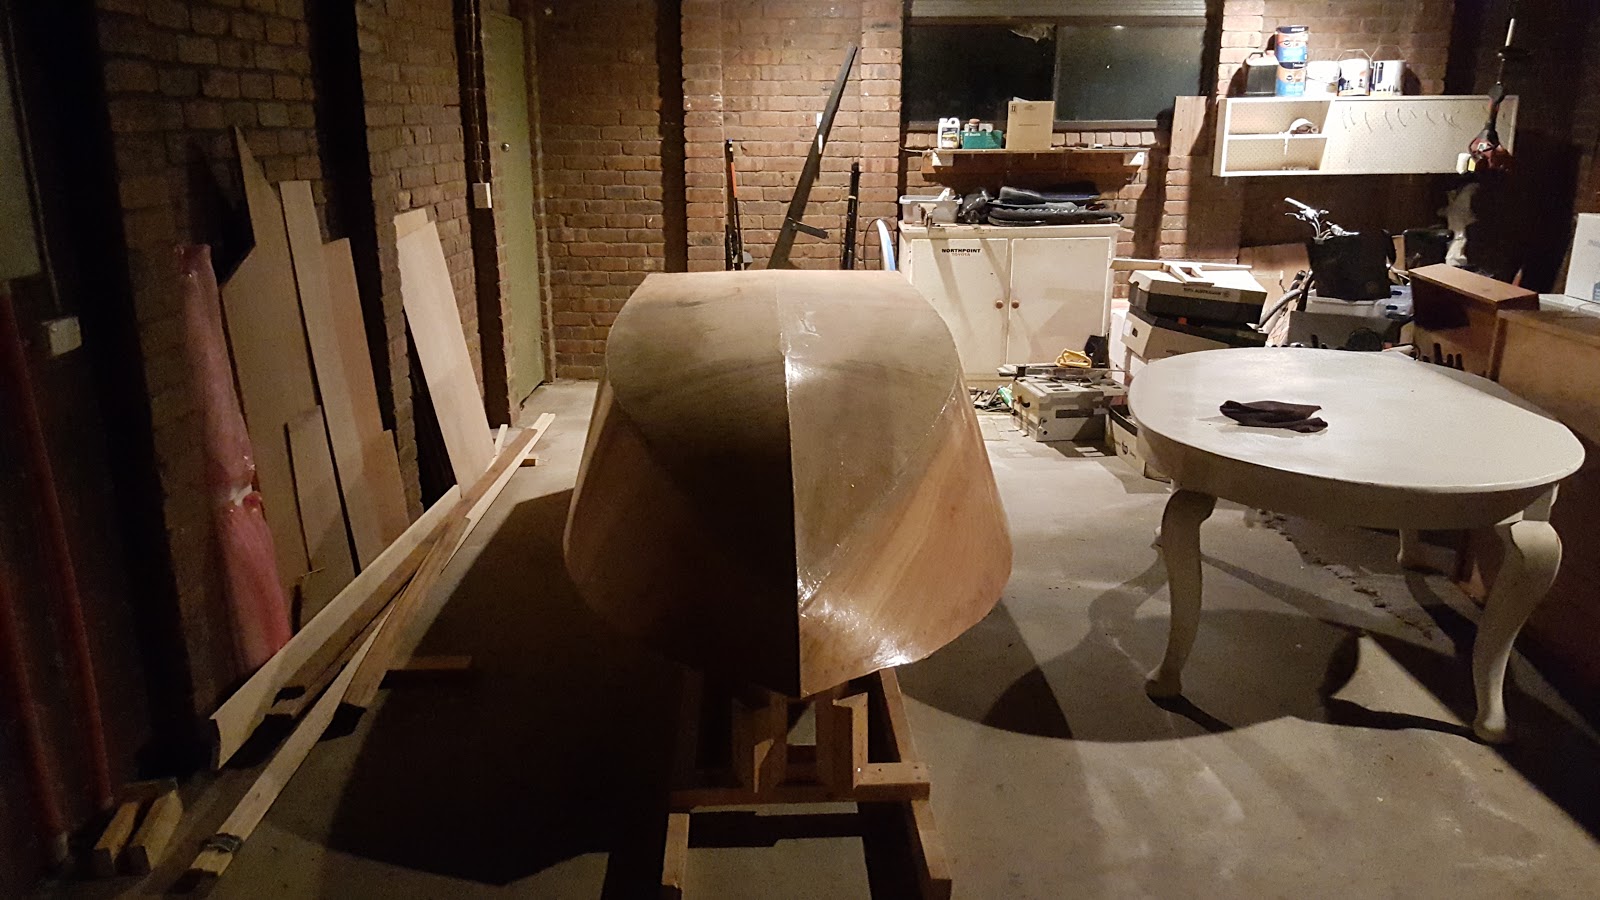
Since the boat has been at its new home, I have installed an external keel and keel strip. The first step was to sand down a flat section around the stem for the keel strip. I installed a piece of fiberglass tape for added strength and durability.
 |
| Fiberglass tap |
The external keel extends from where the stem joins the internal keel to 620mm forward from the transom. I left the 620mm gap to ensure that I don't get cavitation as I have read that some people run into this problem. The external keel is made of 20mm thick kapur and tapers from 15mm to 50mm at the highest point. The external keel was fastened with epoxy and brass screws.
 |
| External keel installation |
The keel strip extends along the curve of the stem and is made up of 3 kapur laminations of 15mm x 5mm. I used weights and some small screws into the stem to secure the keel strip laminations while the epoxy cured. The main purpose of the keel strip is to provide abrasion resistance when bringing the boat up into the shore.
 |
| Installing keel strip laminations |
 |
| The keel strip - the third lamination is yet to be glued on |
 |
| Sanding the hull |
Selamat jalan abang