Monday 2 November 2015

Temple Building

Hearty greetings reader!
It's been a long time since my last post and the poor little boat has been waiting patiently for its owner in the garage.

In the last few months, I've done the most building I have ever done in my life!
But it wasn't 'Boat Building', it was 'Temple Building'!
We had a Bible study youth camp themed 'Becoming Temple Builders' and we studied the short message of the prophet Haggai.
King Cyrus in about 536BC made a decree (recorded in the Bible and on Cyrus' Cylinder) that the Jews exiled in Babylon could return to their land and rebuild Solomon's temple that had been destroyed by the Babylonians 70 years before.
Over a period of about 15 years, the Jews became disheartened and uninterested in rebuilding the temple and focussed on building their own houses instead.
The prophet Haggai gave a message of rebuke and encouragement to the people so that they would resume building the temple and reinstate the proper worship of God. The people responded positively to Haggai's message and got back to work on the temple!
(The prophet Zechariah also encouraged the Jews around this time period).

Because our study weekend was themed on 'Haggai - Becoming Temple Builders', we wrote and performed a play to help the people at the camp understand the context in which Haggai's 4 messages were given. Every good play needs a good set, and as a mechanical engineer it was my job to design the play set. I designed a 15m long set in 3D CAD and then over a period of about 4-5 days we constructed it. The left-hand side of the play set represents the abandoned temple construction site and the archway is just a generic gate which looks cool and acted as a stage entrance point.

Initial concept sketch
3D model of Play Set
Building works underway
The set was built from pallets, MDF sheets, pallet racking and 100's of nails and screws.
The bricks were made from polystyrene boxes cut up and given a coat of paint. The bricks were glued on with liquid nails.
The great thing about a play set (in direct contrast to boat building) is that accuracy is hardly a consideration. I think our tolerances were probably about 10-20cm!
Building works nearing completion.
The finished set
Camp Photo

We also thought it would be a good idea to build a giant timeline of the years surrounding the prophet Haggai to help everyone understand the time period. My wonderful girlfriend and I put together this timeline.
The timeline design
 The timeline was made from dismantled pallets screwed together to form a giant wooden board. It wasn't particularly sturdy, but it worked in the end and had a good rustic look to it.
Constructing the timeline
The completed timeline was put on top of pallets and secured very firmly to the wall.
Giant timeline on the wall

It was a big effort building the set and the timeline but it was lots of fun!
The set and timeline helped us to understand the book of Haggai, to 'consider our ways' before God, and to sharpen our vision of the kingdom of God on earth which Haggai mentions and which Jesus Christ taught us to pray for.

The bonfire where we burnt the remains of the set and timeline!
Now that the Temple Building works are completed and have served their purpose, I will have some more free time to work on my lonely boat. 

Adios fellow 'Boat Builders' and/or 'Temple Builders' or neither.

Tuesday 24 March 2015

Plywood Bottom

Summer is over :-(  but the boat building is not  :-)
I was determined to get the bottom plywood planking on before I go away at Easter time. 
As of today, I have half the bottom planking glued on!

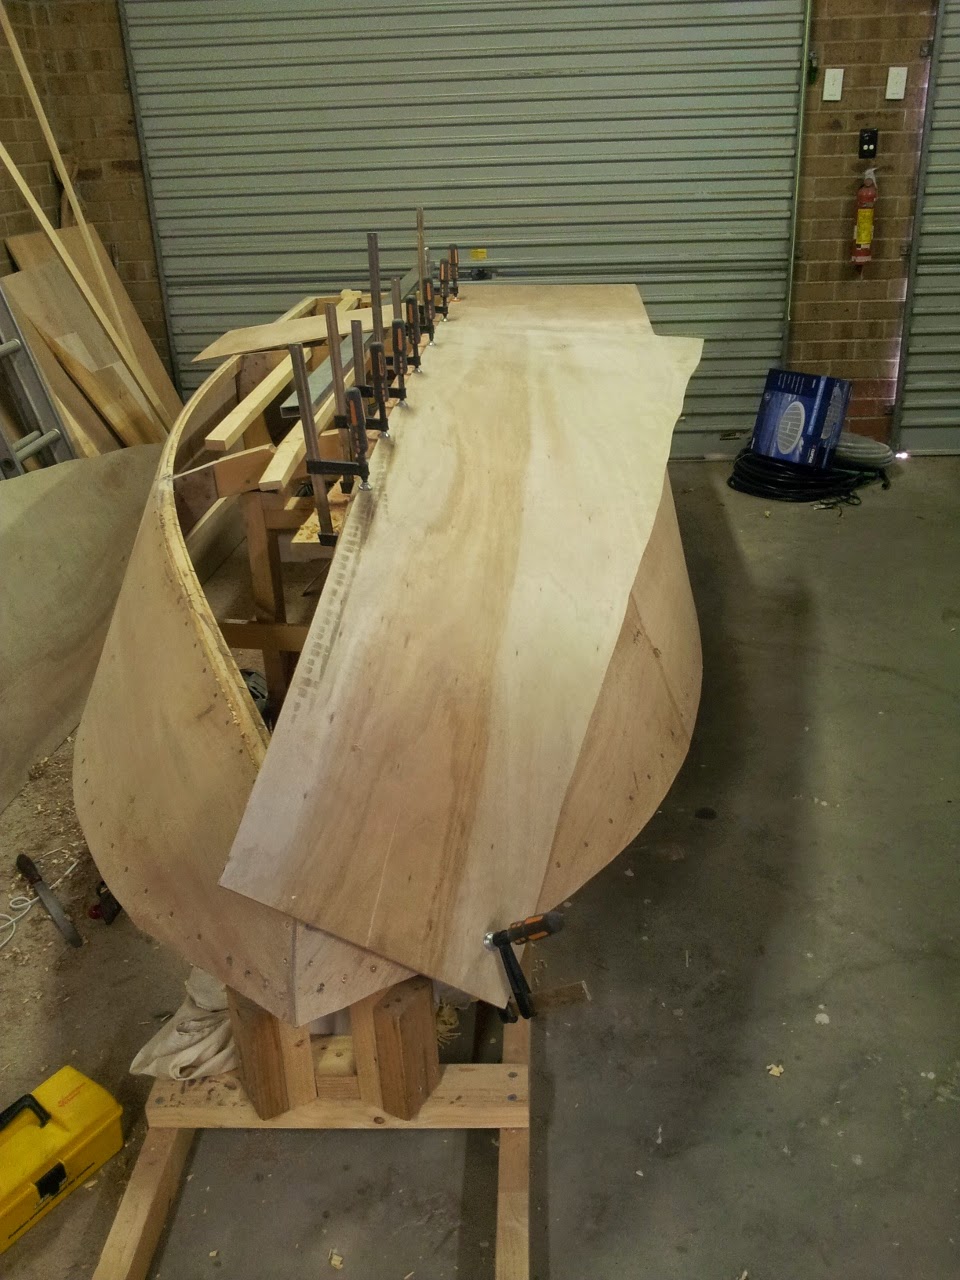
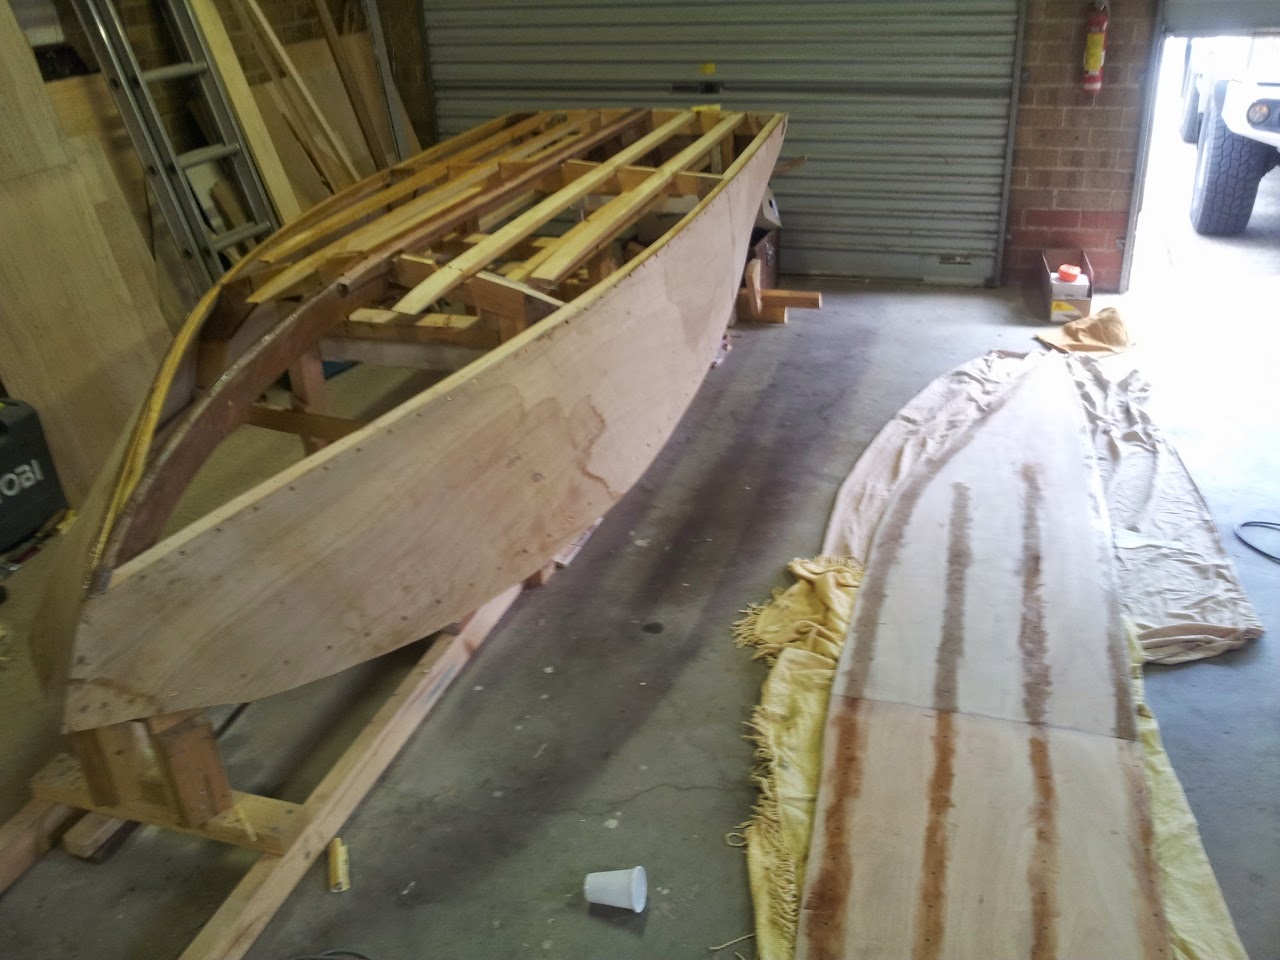
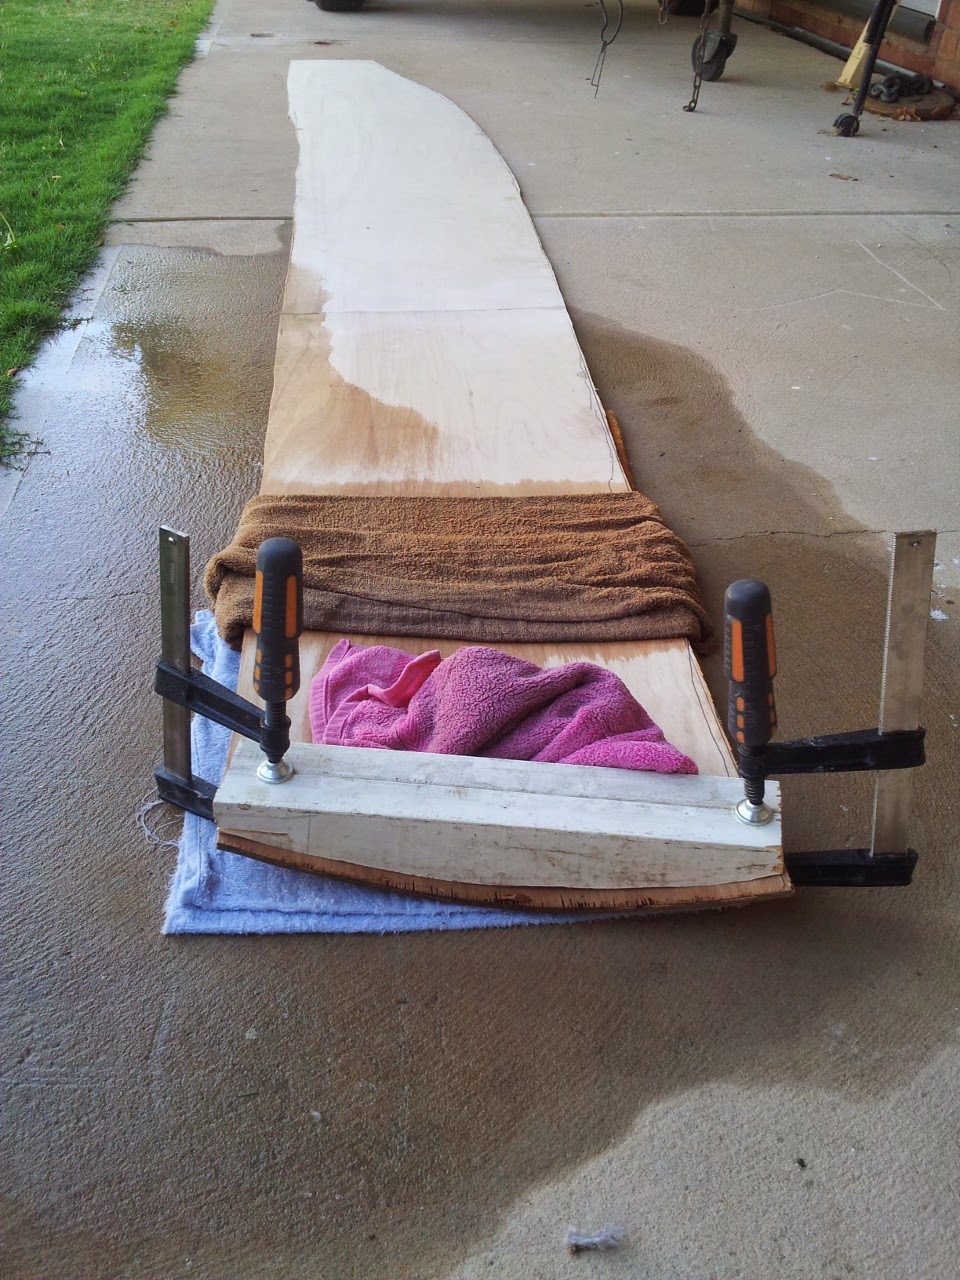
The plywood bottom planking had been scarf jointed before my last post. The first step in regards to getting the bottom planking installed, was to cut the panels roughly to size. The planking was laid on the boat, rough marked to approximate size, and trimmed accordingly.
Rough fitting the bottom planking
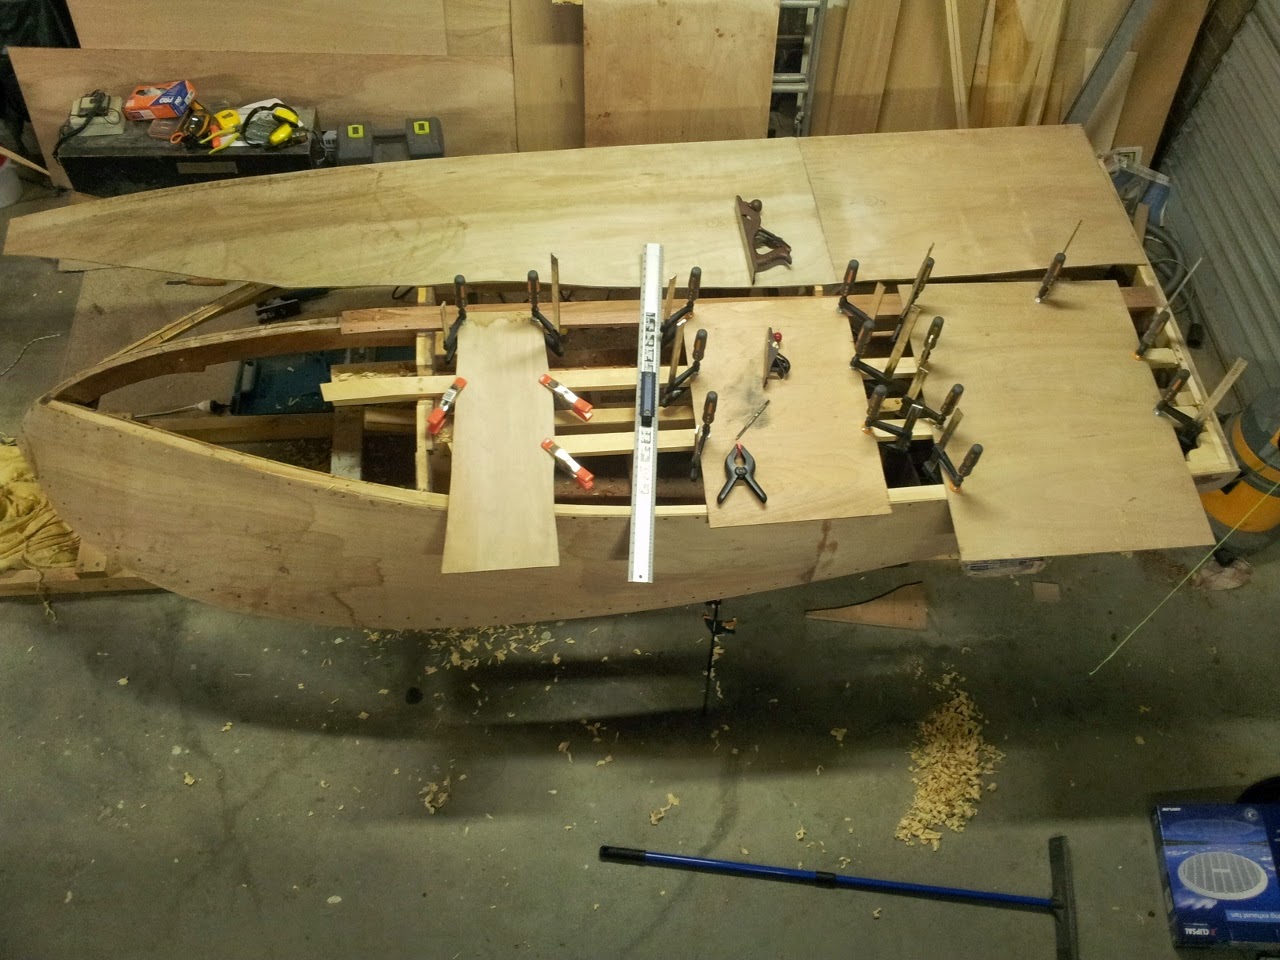
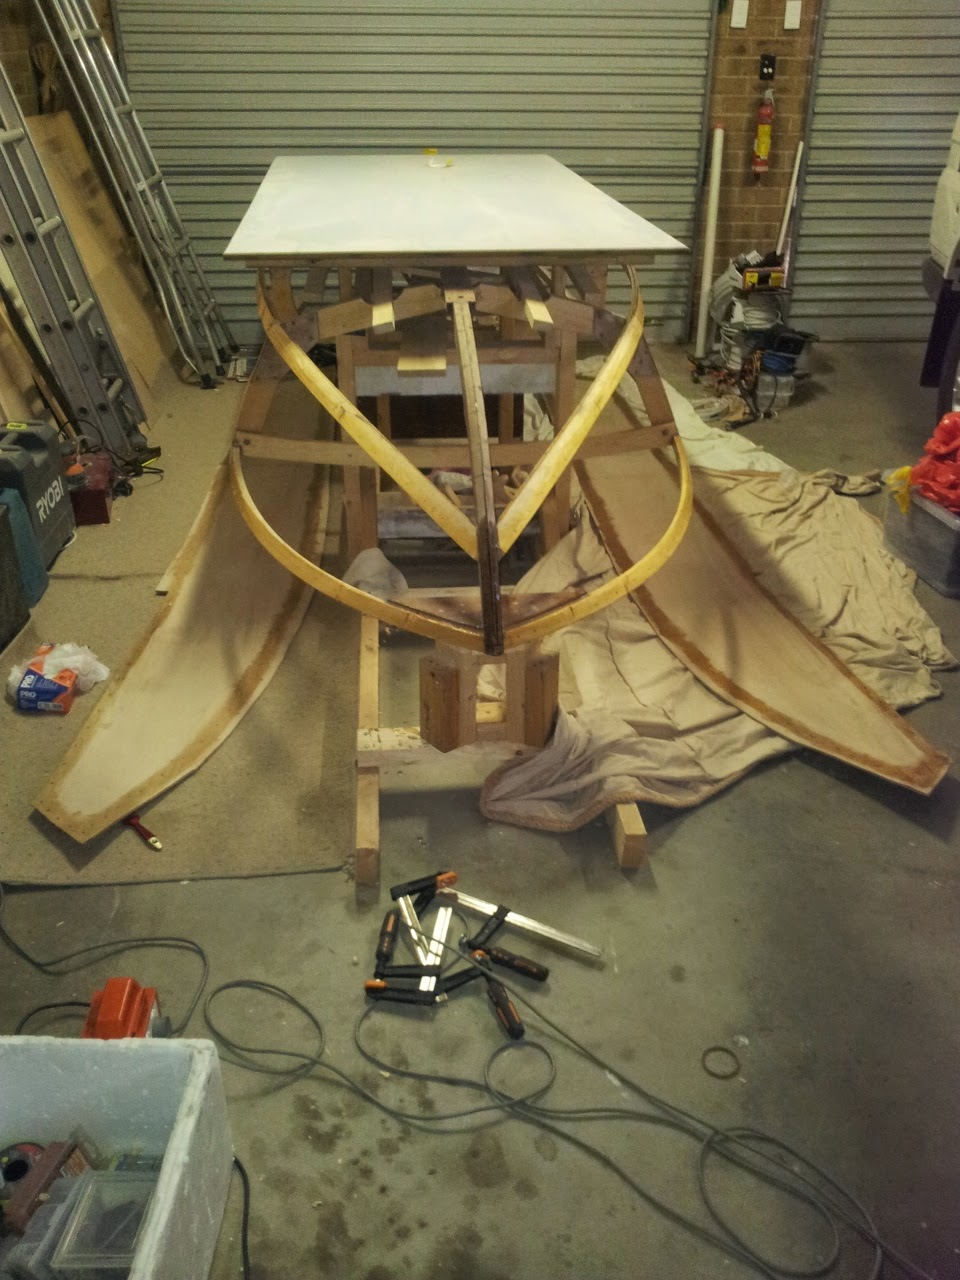
One of the major steps to be completed was the fairing of the keel, battens, chine and stem. It was a trial and error process to get the right curves near the bow of the boat. In the photo below, small plywood panels are being used to determine where material needs to be removed and how much.
Determining where to remove material during fairing
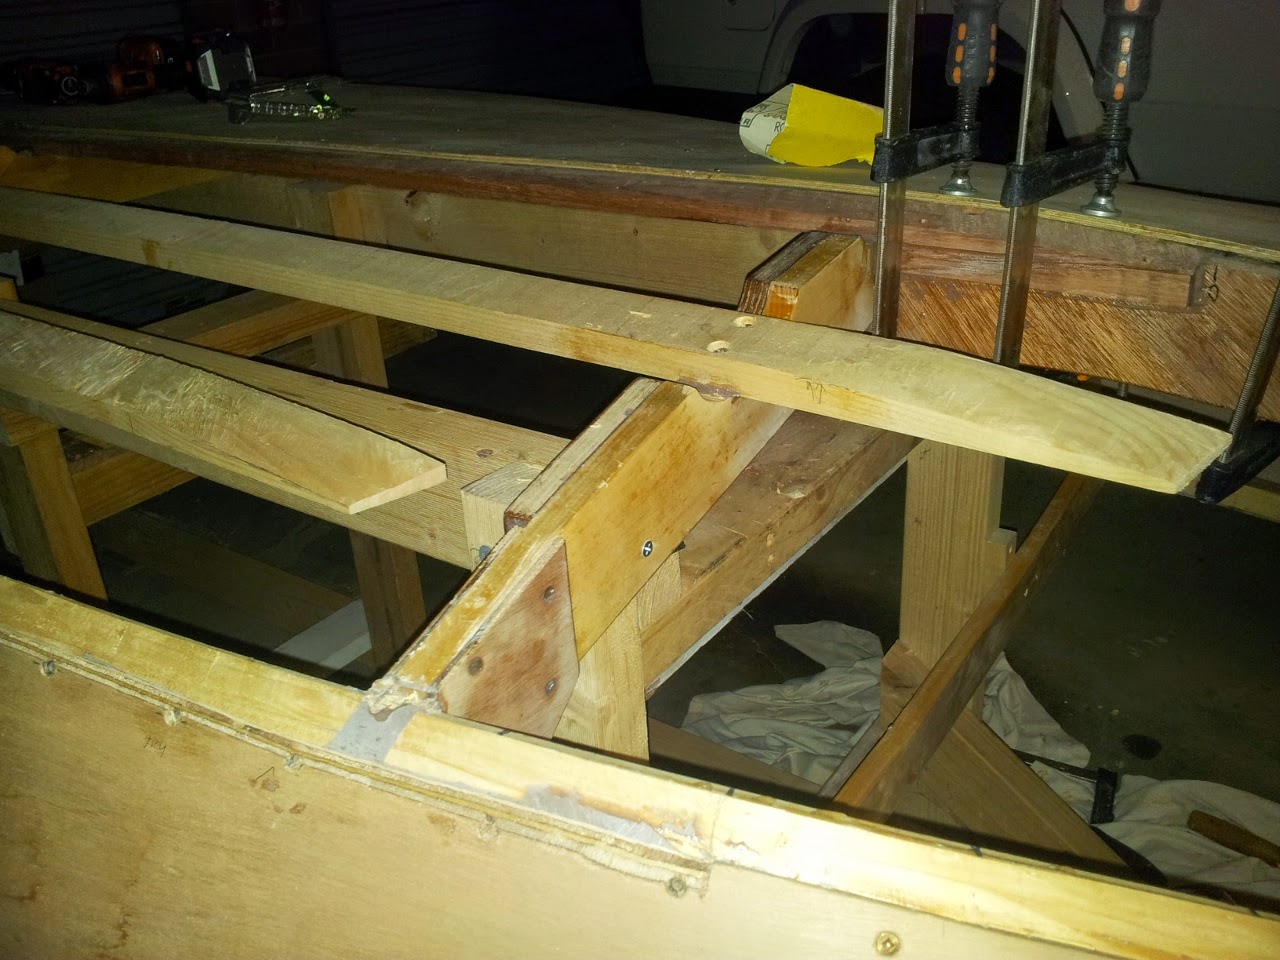
The ends of the battens were particularly challenging. I got blisters on my hands planing them down to a taper. There was a lot of trial and error getting it right.
With the planking clamped to the keel and my amenable family members holding the plywood against the chine,  I climbed repeatedly under the boat to observe where material needed to be removed from the battens. The plywood then being removed, the battens were planed to shape and the process was repeated. I didnt get it perfect but I am convinced the fit is good enough.
Fairing the batten ends
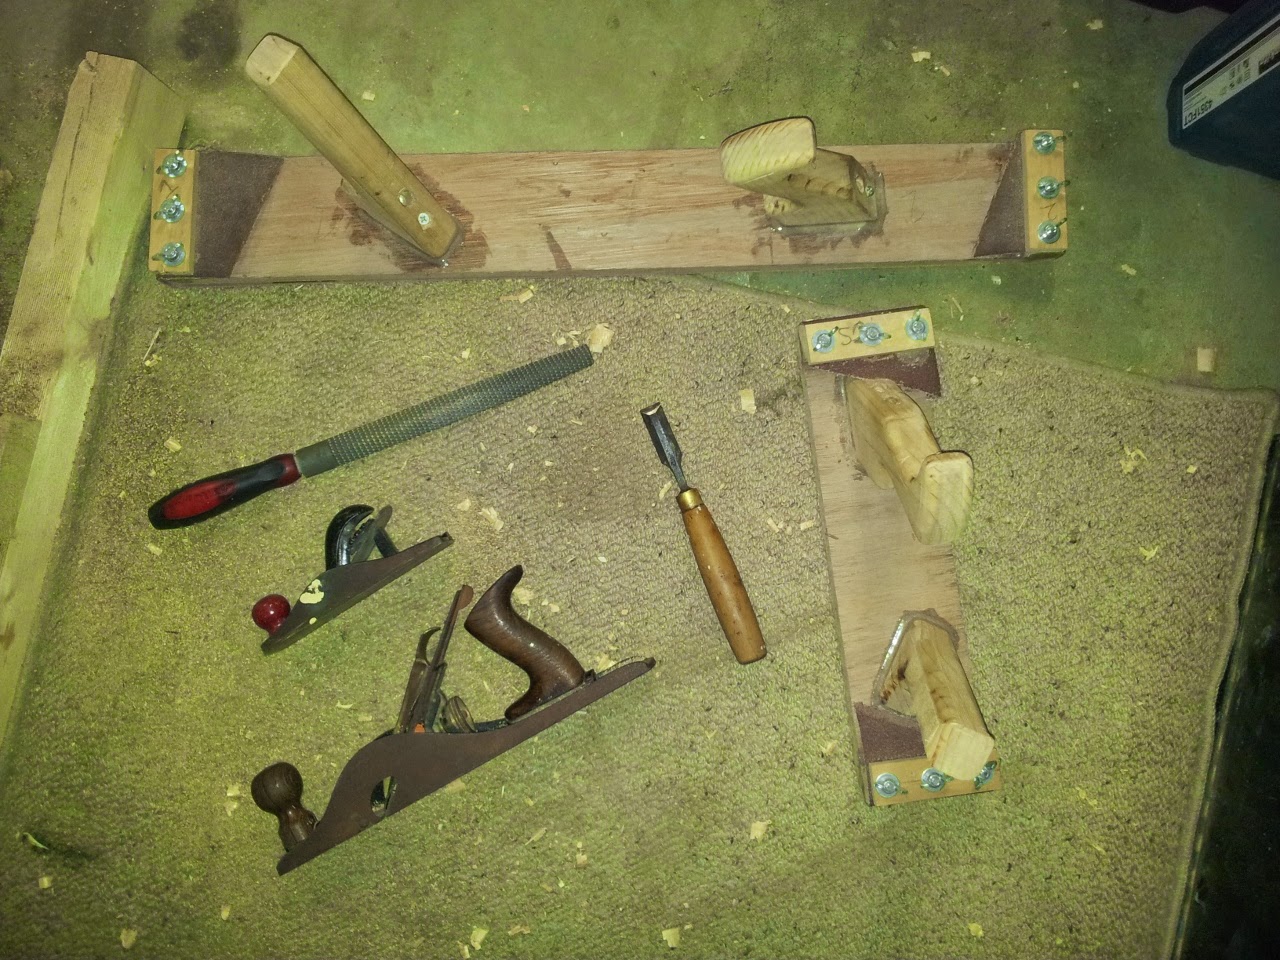
The tools used for fairing included a block plane, a rebate plane, a rasp, chisels, sanding boards and good old sand paper. The most useful tools by far were the planes.  I briefly tried using a power plane but quickly gave up as it was simply too unwieldy.
Fairing tools
 Initially, I was really struggling with fairing the hardwood kapur keel. I had resorted to vigorously sanding with my sanding boards to obtain the correct angle on the keel. This was working ok, but it was incredibly labor intensive.
It was then that I made the brilliant decision to properly sharpen by plane blades. 
I can't emphasise enough how much difference razor sharp plane blades make!! 
Do yourself a massive favor and sharpen your tools!!
(probably everyone goes through this realisation at some time in their life)
After sharpening the blades, the kapur keel became like butter and the fairing became a delicious dream.
I received 3 whetstones for my birthday along with a honing guide. The epoxy deadens the blades fairly quickly but keeping the blades sharp makes fairing very quick and easy.
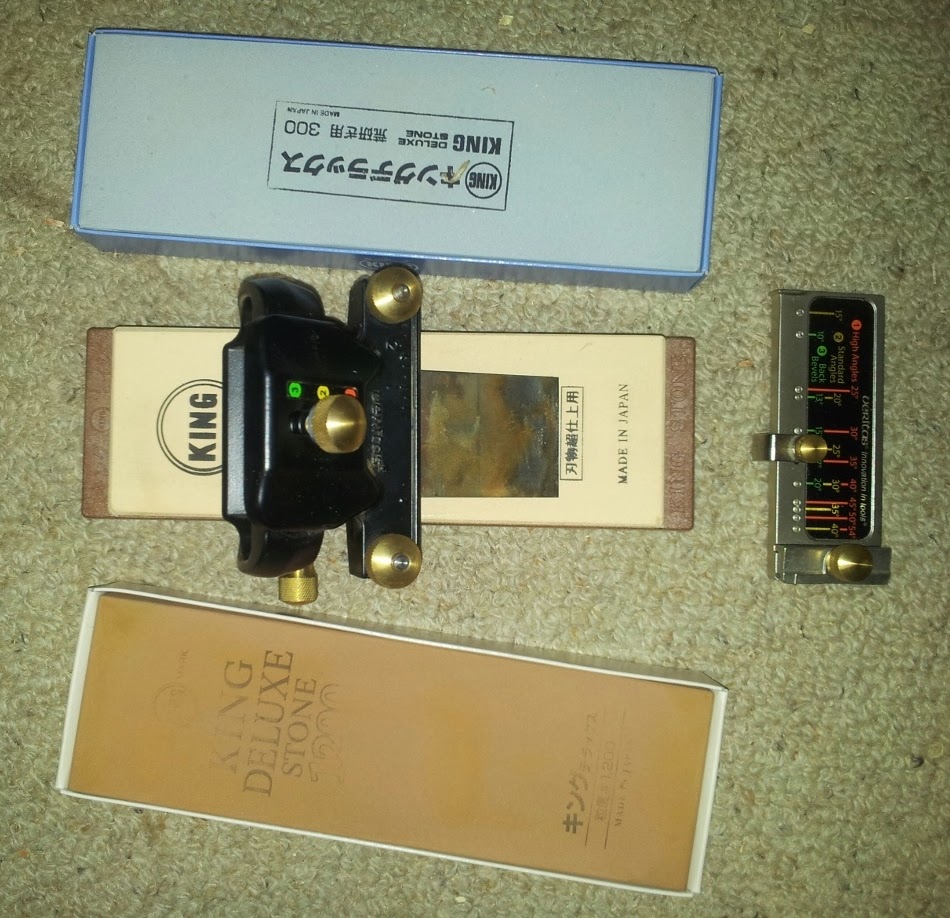
Japanese Whetstones - from top - 300 grit, 6000 grit & 1200 grit
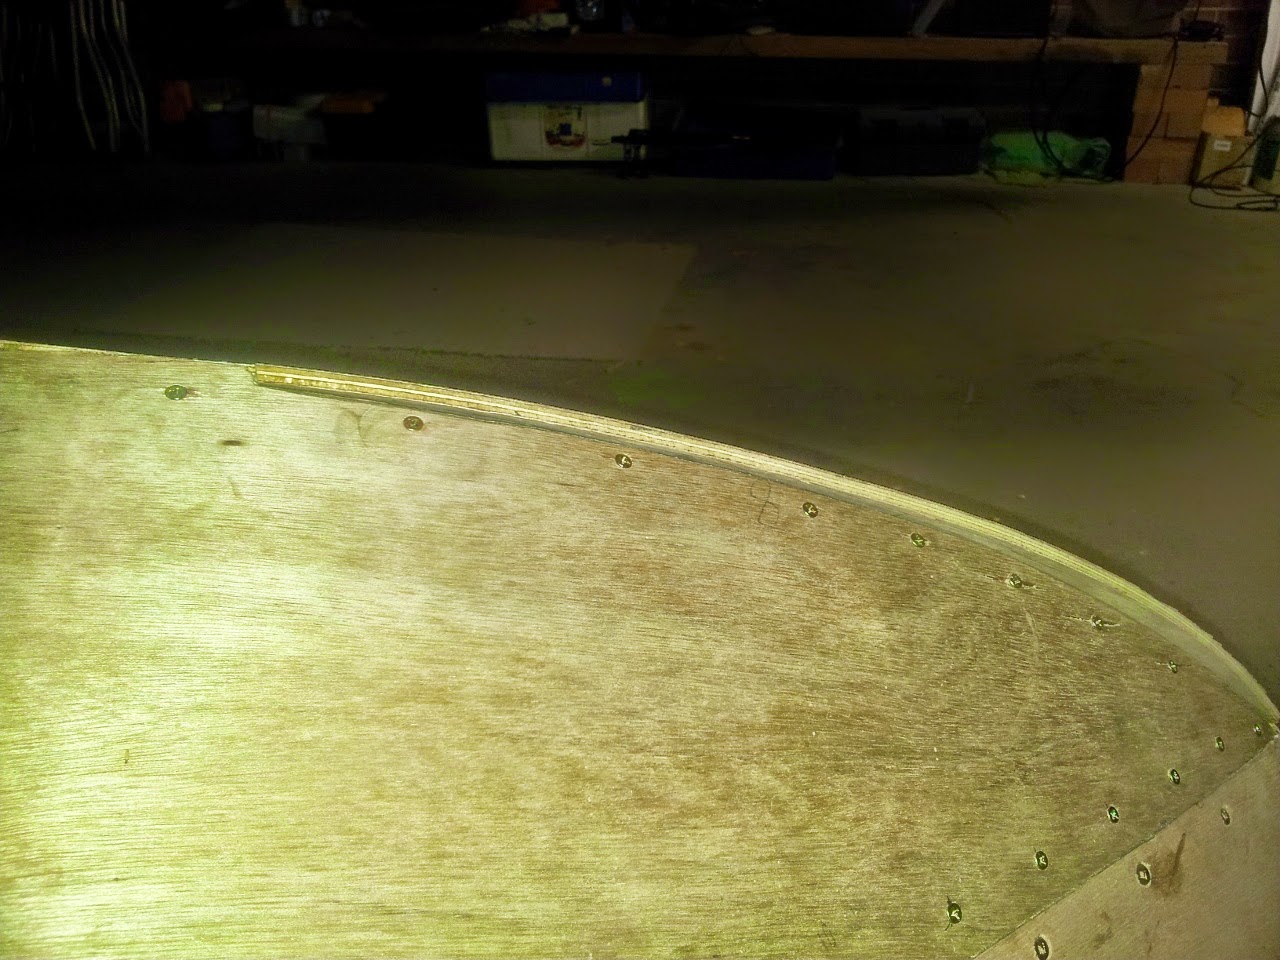
Once the keel, battens and chines were faired, I worked on creating the butt joint between the side and bottom planking near to the bow. Carbon paper was very useful for determining at which point to trim the bottom planking. Working along the chine towards the stem, I completed the butt joint by marking with carbon paper; trimming with a jigsaw; and finishing the joint with a hand plane. It required quite a bit of trial and error but I am very happy with the result.

Using carbon paper to mark the butt point position on the bottom planking
Half way through creating the butt joint along the chine at the bow
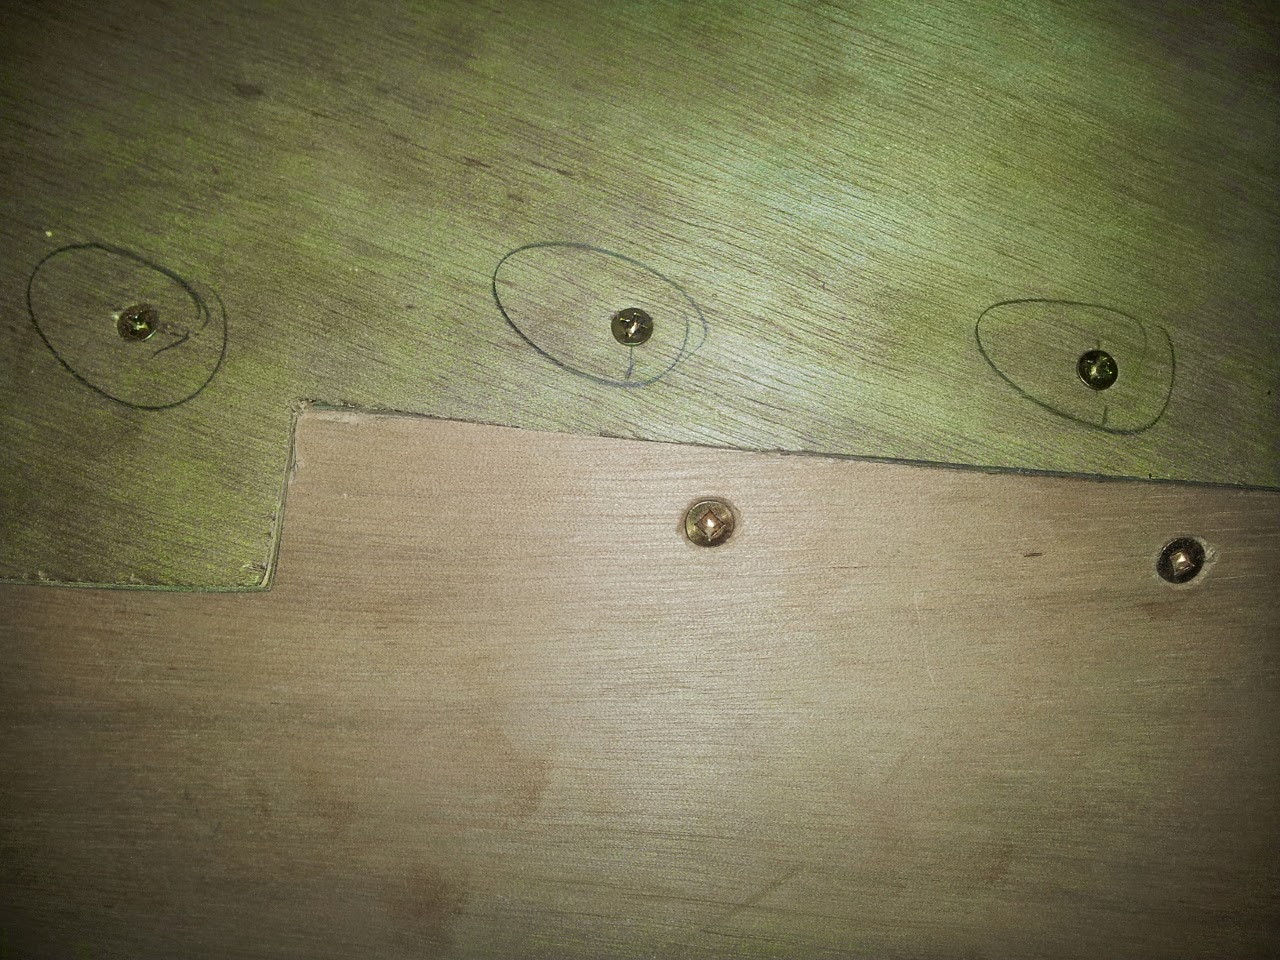
Transition joint  - lap joint to butt joint.
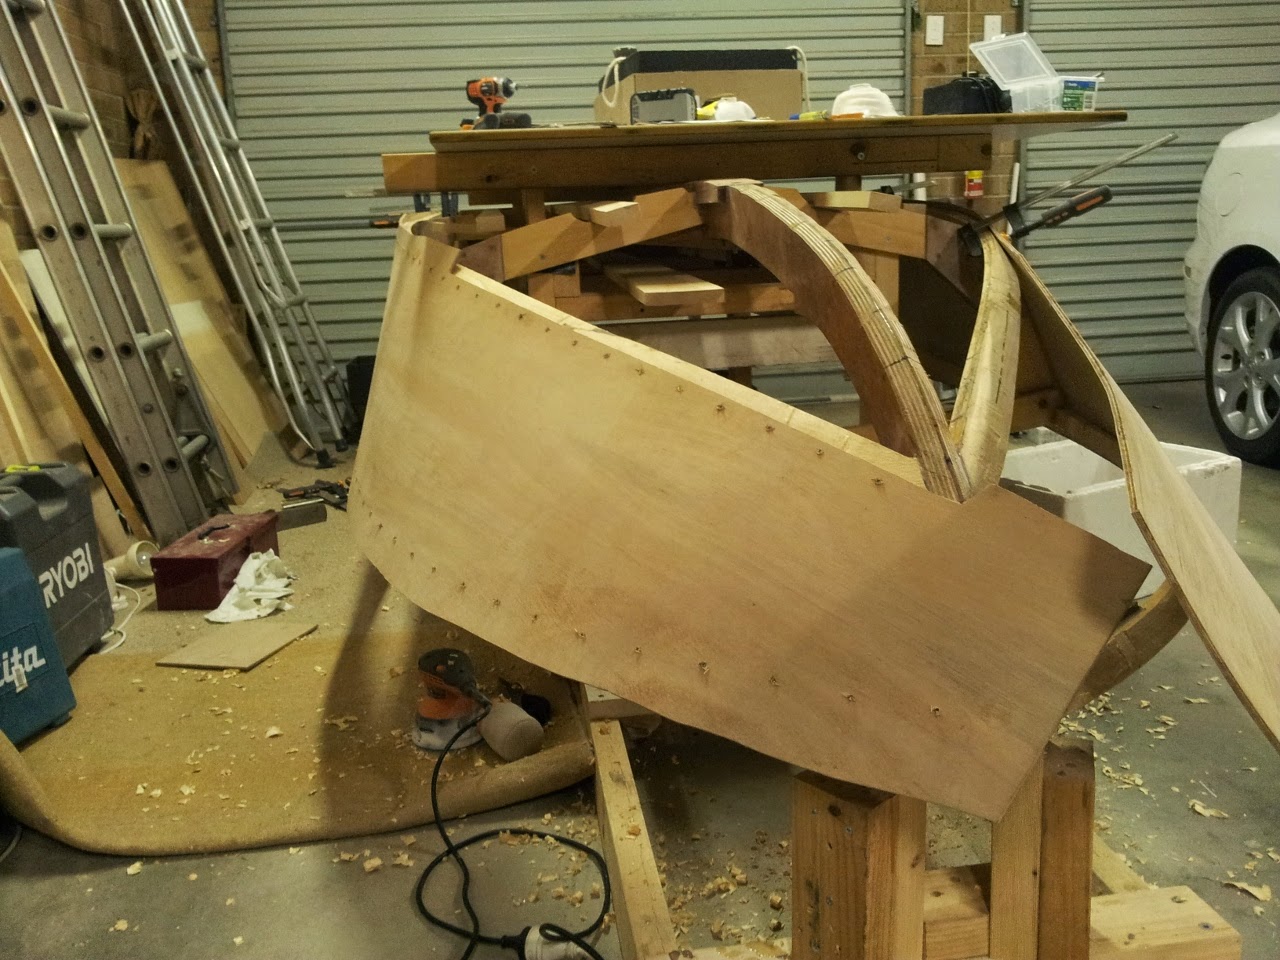
A rough fit of the bottom planking was carried out using 6 gauge self drilling wood screws. As with the side paneling, these screws provided a pilot hole for the 8 gauge silicon bronze screws used in the final application.
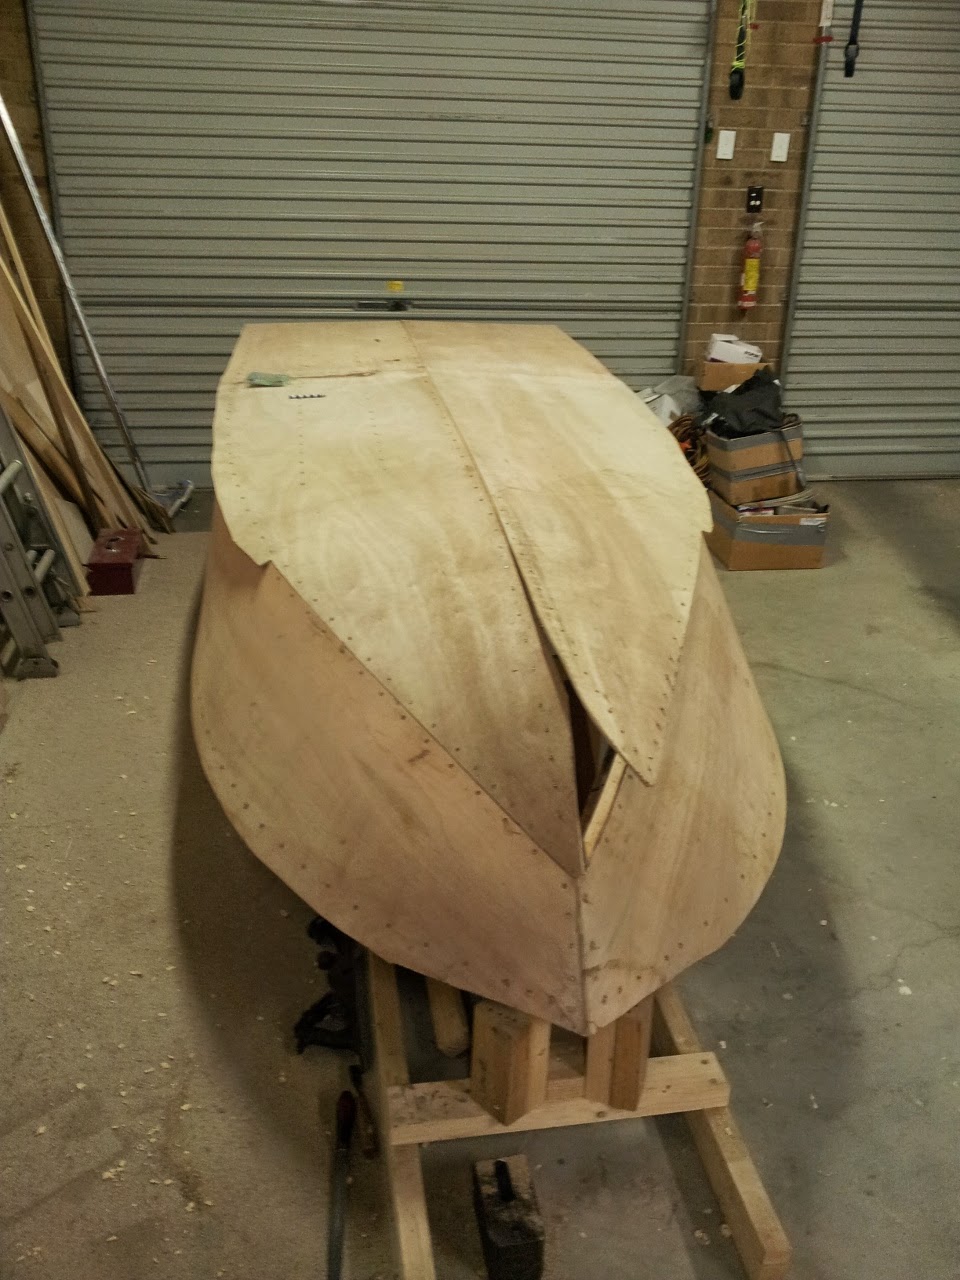
Rough fitting the bottom planking
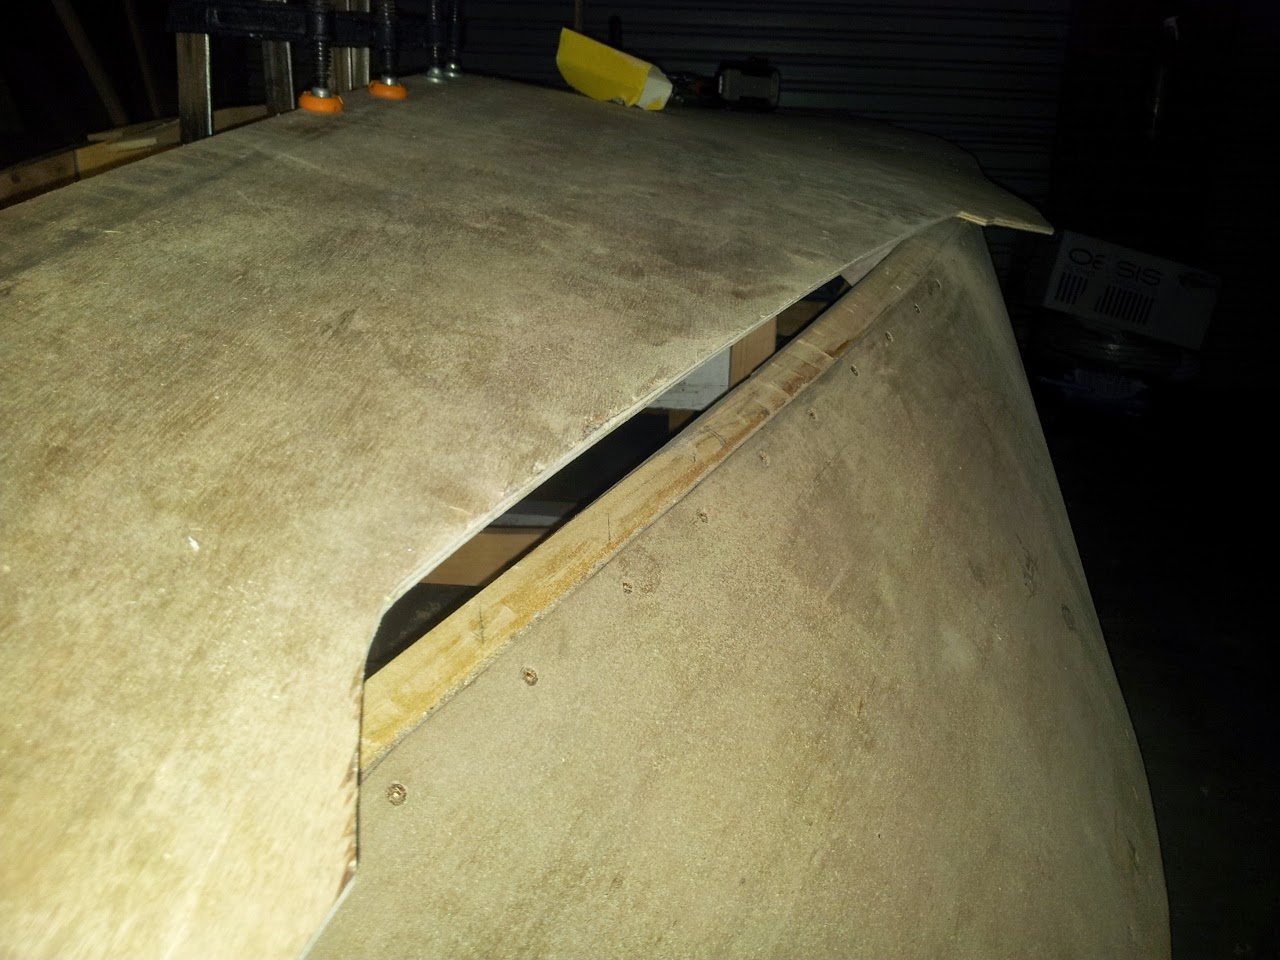
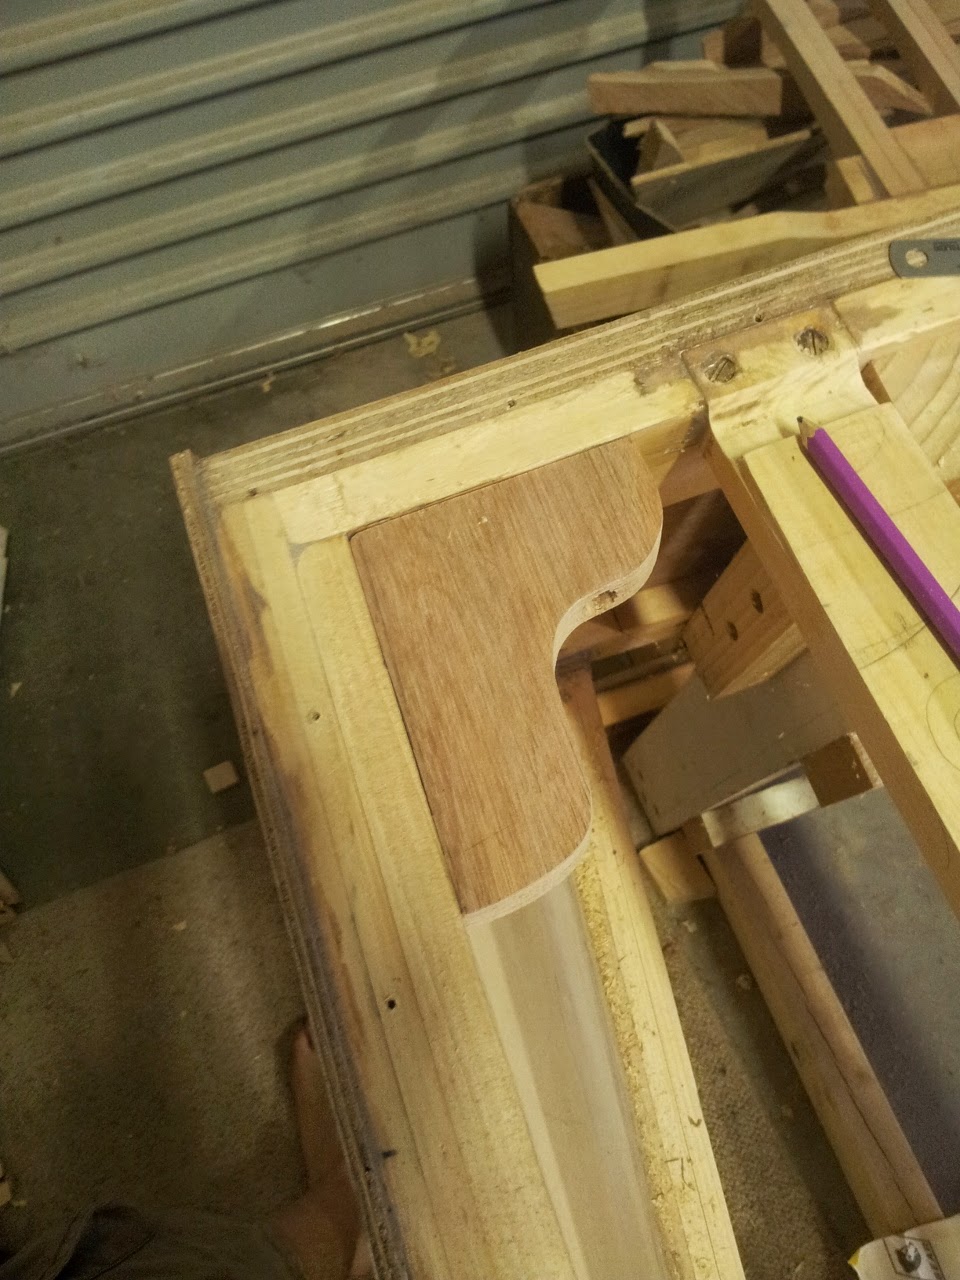
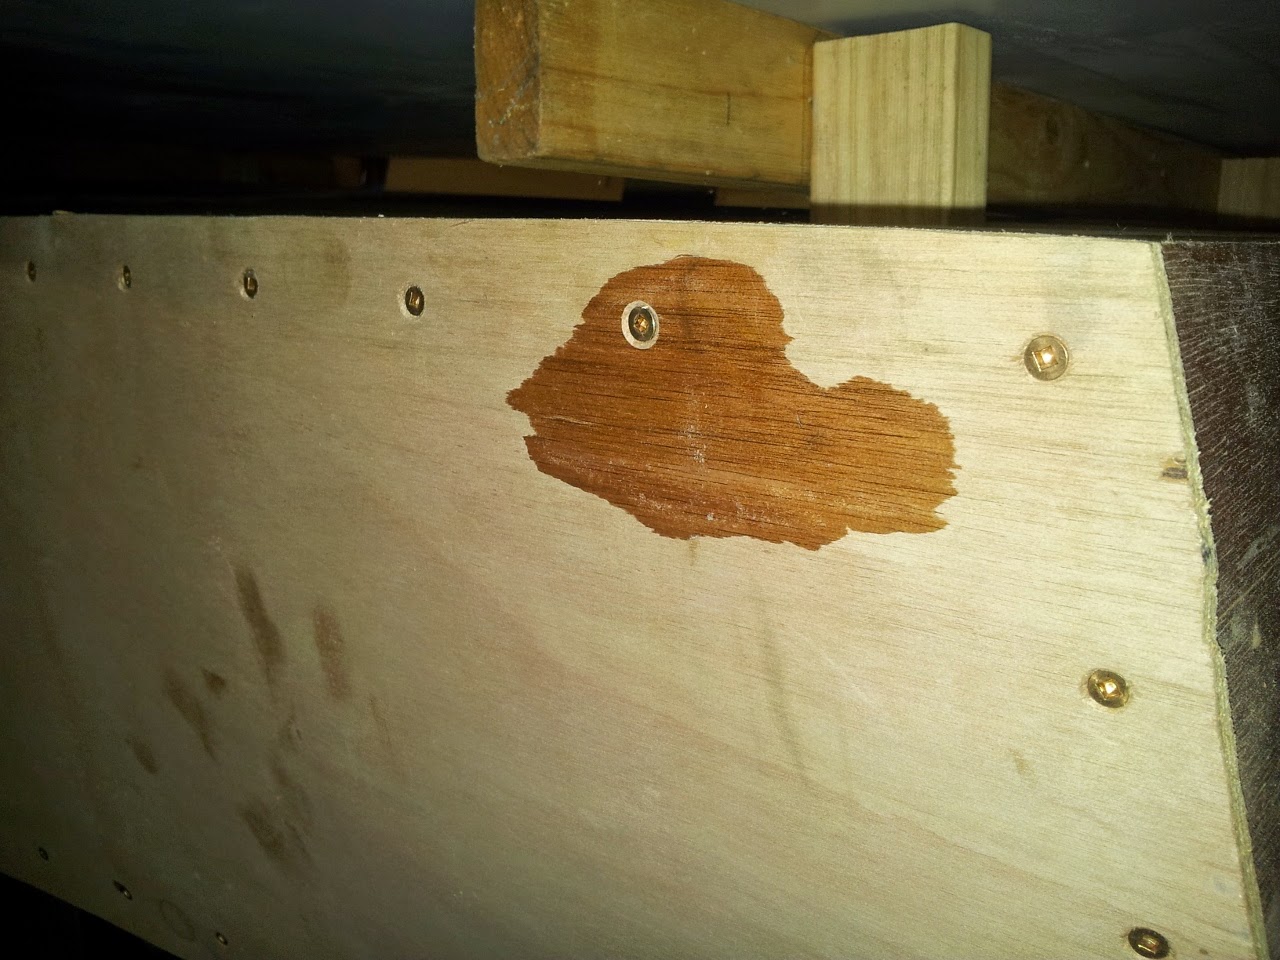
The plywood paneling edges were angled slightly with a plane to achieve a good butt joint along the keel. The meeting point of the two plywood panels at the stem required some careful work. Halfway along the stem there is a transition joint where the bottom planking goes from butt jointing to lap jointing. The butt jointing required some careful work with the rebate plane to get it accurate.
Transition joint between bottom panels at stem.
The plans require installation of knees at the transom-chine junction. These were made out of plywood and the transom angle on the knees were cut on the scroll saw. The size of the limbers was increased to ensure that water will freely flow without the limbers getting clogged up with various, filthy, river water debris.
Installation of transom-chine knees & enlarged limbers
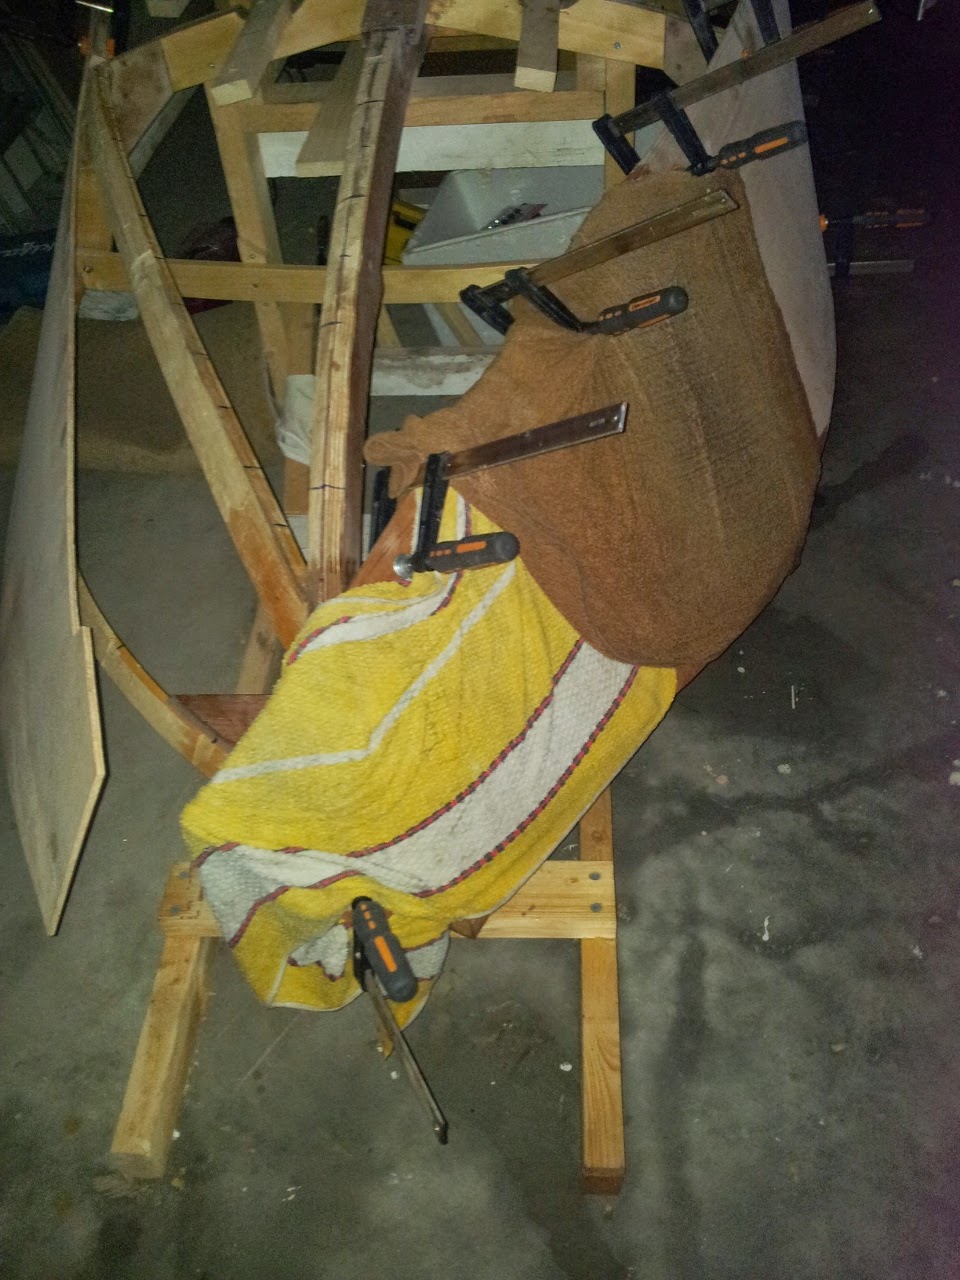
Before the final glue-up, the internal surfaces of the limbers were coated with epoxy as this would be very difficult to do once the bottom planking is installed.
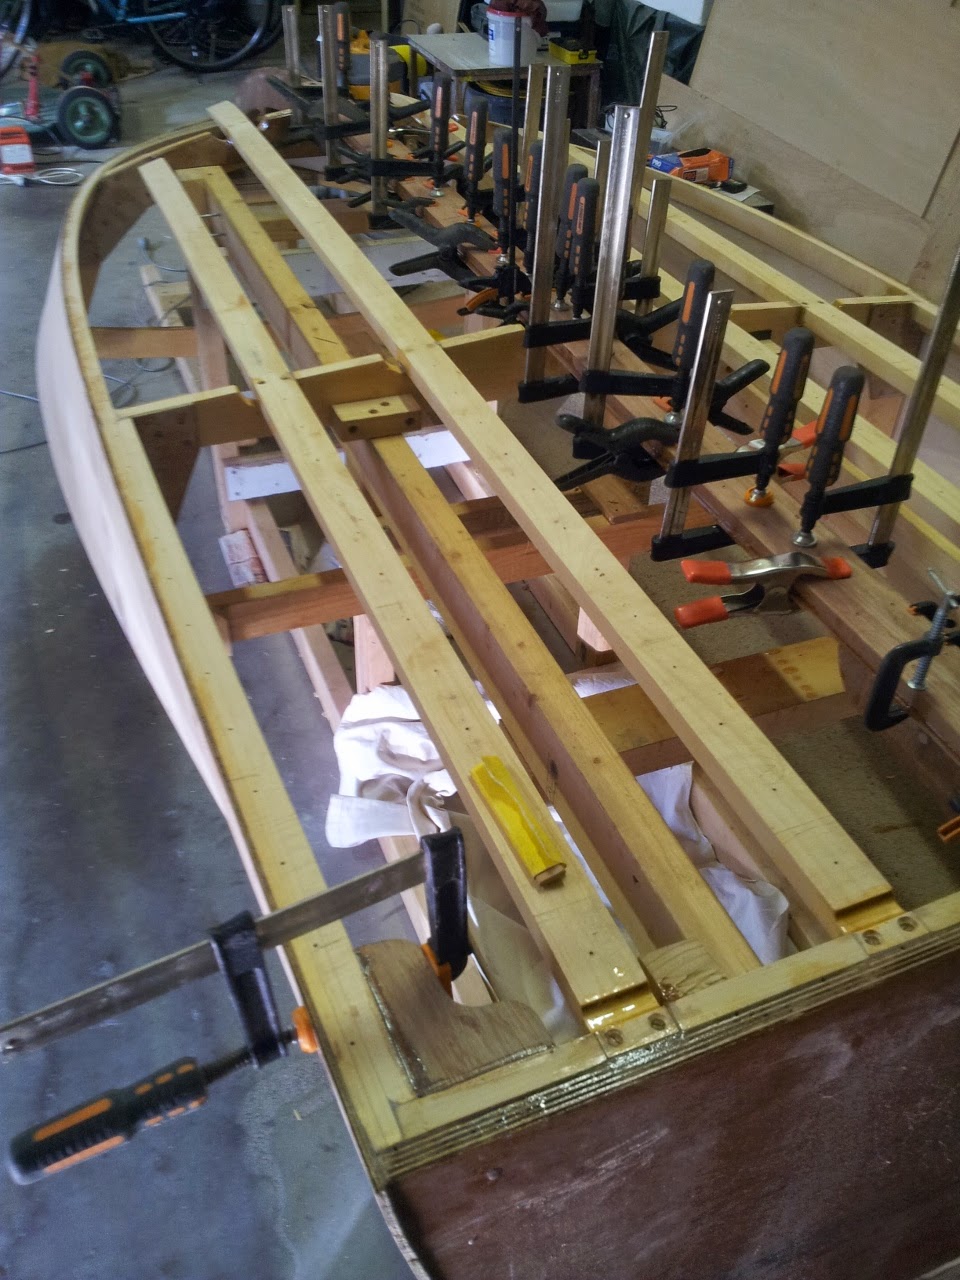
A 5mm lamination of kapur was added to the keel to bring it to 25mm thick as specified in the plans. 20mm probably would have been ok;  however to my eye it looked too small and I would have been forever annoyed and bothered that it was not 25mm.

25mm it now is and I am a happy man!

Gluing the keel lamination, gluing transom-chine knees and coating limbers.
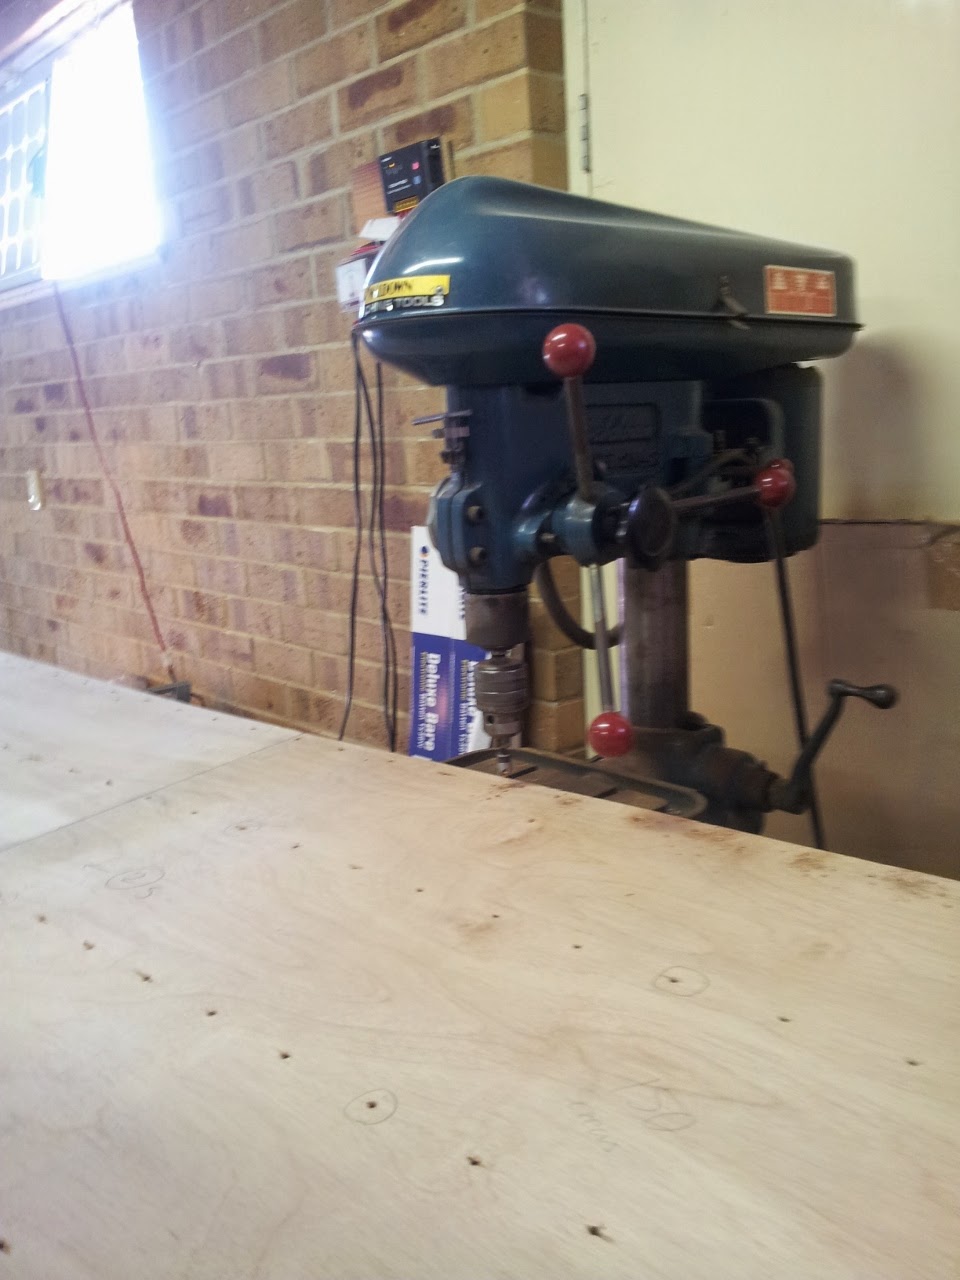
The screw holes in the bottom panel were countersunk on the drill press (the holes in the centre of the board were done with the hand drill due to insufficient depth in the drill press table.)
Countersinking holes in bottom planking
All surfaces to be glued were thoroughly sanded and vacuumed before the application of epoxy. As with the side planking, all surfaces were given an initial coat of epoxy and left for an hour or so to allow the epoxy to seep into the timber.
Pre-coating with epoxy
Thickened epoxy was spread liberally on all the joint surfaces and the panel was screwed in place with 144 screws.
All the excess epoxy was scraped away while it was soft. This will make my job a lot easier later on. Adding extra height to the building form was a brilliant idea as I have been frequently climbing under the boat and it is difficult enough as it is!

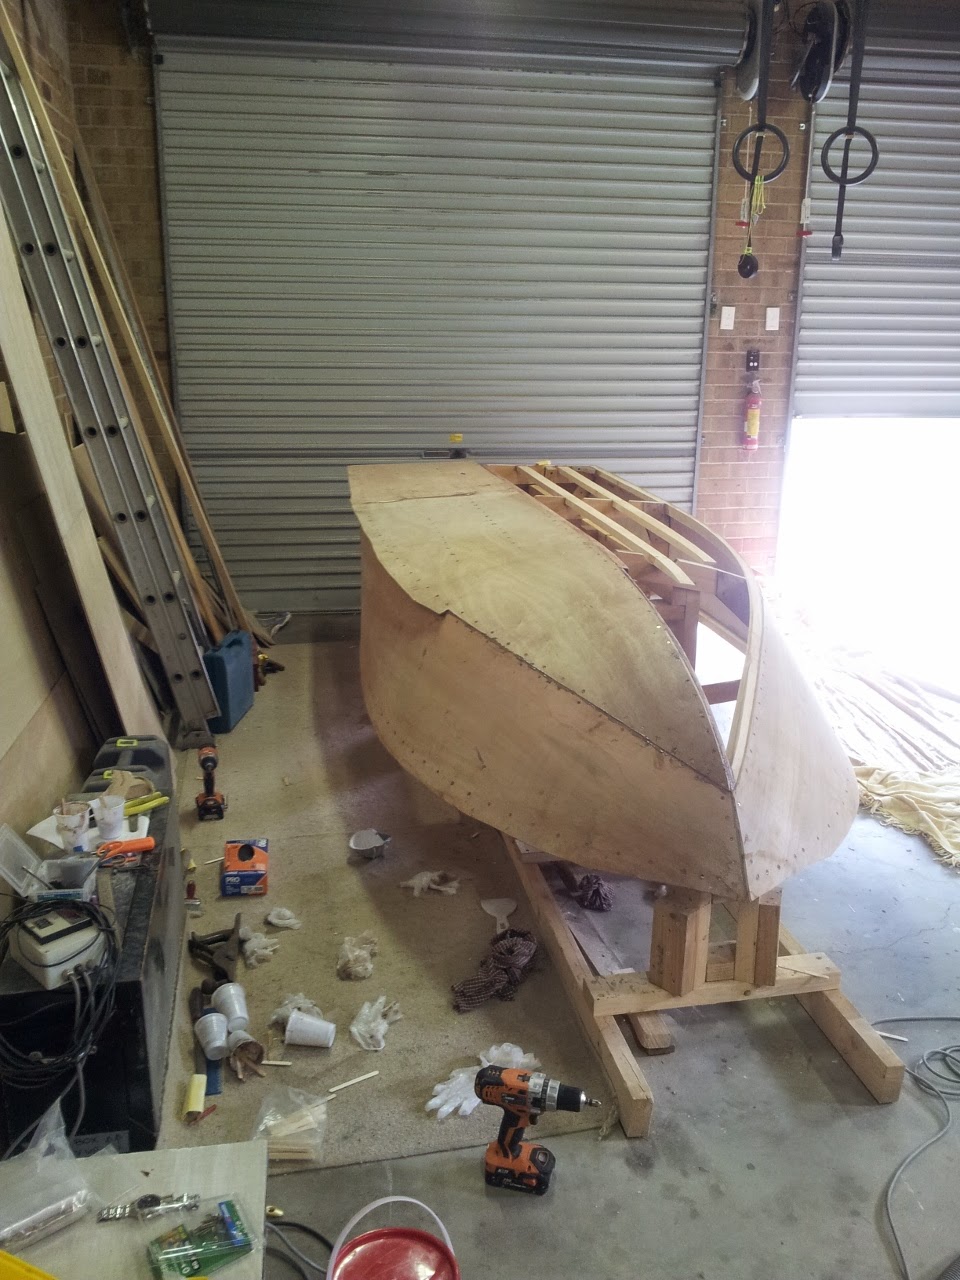
The final result is that half the bottom paneling is installed! 

If I got all my friends together and we all sat on the port shear, the boat would probably float! But I think I'll just wait till friday when I plan to have both bottom panels glued on. Actually, I think I'll finish the boat completely before placing in the water!
Plywood panel glued in place
The weather is getting colder already and I have a busy schedule ahead of me this year. I am not sure how much I'll get done over the winter but for now I have achieved my objective of getting the bottom of the boat glued on (provided I get the other half glued on this week).

Till next time reader.


Wednesday 14 January 2015

Plywood Sides

The boat has been progressing well over the end of year period!

I continued work on fairing the starboard side of the boat to get it ready for the installation of the plywood side panel. Following the recommendations in the book 'Boatbuilding with Plywood', I faired the frames to ensure they would not protrude against the plywood panels. 

Because the bend required around the transom is quite significant, I decided to pre-bend the starboard side panel with a jig. The plywood was steamed with boiling water and towels. I am unsure if this was worth the effort because the port panel bent into place with equal effort without this pre-bending treatment.
Steaming starboard side paneling to conform to transom curvature
 The plywood was clamped into rough position and the bend at the stem was created with the help of towels and lots of boiling water. After the plywood dried, it retained some of the bend allowing it to much more easily conform to the required shape. I would highly recommend steaming the plywood into place with this method as it makes the job much easier.
Steaming starboard planking at bow
The bend in the starboard paneling at the transom caused some trouble because the outer layer of plywood (in tension) developed a crack of about 2.5cm. This caused a noticeable kink in the side panel. To solve this problem, I laid the plywood on a flat surface and glued up the crack with epoxy. Gluing up the crack worked remarkably well with the plywood bending appropriately without cracking. To me this is a testament to the excellent properties of epoxy for boat building applications.
Starboard paneling crack glued up and preforming perfectly after sides are glued on
 In order to dry fit the plywood paneling, the positions of the screw holes in the plywood panels needed to be determined. This was achieved by clamping the panels in place and tracing around the shears and chines to mark their positions on the plywood. The plywood was then laid on the table and the hole positions were marked along the sheer and chine lines at a distance of 3 inches apart. The screw holes were drilled and countersunk on the drill press, which facilitated the countersinking of all the holes to the same depth.
The panels were initially fastened to the side of the boat with 6 gauge wood screws as a dry fit. The screw holes left acted as pilot holes for the final silicon bronze screws which are 8 gauge.
Dry fitted port panel
 Fortunately, I had the help of my friend Steve for the gluing on of the side panels. It was a big job which took 3-4 hours. Firstly, I sanded all the mating surfaces and gave them an initial coat of epoxy allowing 45 minutes for the epoxy to seep into the wood.
All mating surfaces coated with epoxy
Thickened epoxy was applied to all the mating surfaces before the panel was screwed in place. Although it would have been possible to do this myself, I would definitely recommend having some help for this stage. Two drills are very helpful for installing the 100 screws in each panel.
Note that I had already trimmed the plywood at the stem when it was dry fitted.
Installation of  port panel.
The starboard panel was fitted in like manner to the port panel. A clamp was used to hold the plywood against the stem. Using pop-sticks, I applied thickened epoxy fillets to all the internal plywood-frame junctions.
Side paneling installed
 Additional clamps were required to hold the plywood in position near to the transom
Clamping plywood at transom
After the epoxy had cured, the plywood was trimmed and sanded at the front of the boat to form a curved line that hopefully will one day cut through the water like a knife through Camembert.
Trimming plywood at bow
Installing the side plywood felt like a important milestone. 
My boat has gone from looking like a  just a wooden frame to actually looking half like a boat!

I have started the fairing of the bottom of the boat and have scarf jointed the plywood panels for the bottom. As a whole, I am happy with how the boat is progressing and I am hopeful that I can get the bottom paneling on before the summer is over.